
http://imall.iteadstudio.com/raspberry-pi-gsm-add-on.html
http://www.adafruit.com/products/2260


http://kubii.fr/modules-adafruit/379-pack-batterie-rpi-10000-mah-3272496001121.html


/etc/network/interfaces
auto lo
iface lo inet loopback

### port ethernet de la carte
### adresse fixe pour réseau local
# iface eth0 inet static
# address 192.168.1.20
# netmask 255.255.255.0

### ou adresse dhcp pour connexion a box internet
auto eth0
allow-hotplug eth0
iface eth0 inet dhcp

### port ethernet USB
iface eth1 inet dhcp

### wifi
allow-hotplug wlan0
iface wlan0 inet dhcp
wpa-ssid "myssid"
wpa-psk "mypass"

allow-hotplug ppp0
iface ppp0 inet dhcp
$ sudo sh -c "(echo nameserver 8.8.8.8 ; echo nameserver 8.8.4.4) >> /etc/resolv.conf"
$ sudo ip route replace default via 192?168.43.1 dev wlan0
$ sudo ifdown wlan0
$ sudo ifup wlan0
$ sudo apt-get install tightvncserver
#!/bin/sh
### BEGIN INIT INFO
# Provides: vncboot
# Required-Start: $remote_fs $syslog
# Required-Stop: $remote_fs $syslog
# Default-Start: 2 3 4 5
# Default-Stop: 0 1 6
# Short-Description: Start VNC server at boot time
# Description: Start VNC server at boot time.
### END INIT INFO

USER=root
HOME=/root
export USER HOME

VNCUSER='pi'
eval cd ~$VNCUSER

case "$1" in

 start)
  echo "Starting VNC Server for $VNCUSER"
  su $VNCUSER -c '/usr/bin/tightvncserver :1'
  ;;

 stop)
  echo "Stopping VNC Server"
  # /usr/bin/tightvncserver -kill :1
  pkill Xtightvnc
  ;;

 *)
  echo "Usage: /etc/init.d/vncboot {start|stop}"
  exit 1
  ;;

esac

exit 0
$ sudo chmod 755 /etc/init.d/vncboot
$ sudo update-rc.d vncboot defaults
$ sudo nano /etc/inittab
1:2345:respawn:/sbin/getty --noclear 38400 tty1
# 1:2345:respawn:/sbin/getty --noclear 38400 tty1
1:2345:respawn:/bin/login -f pi tty1 /dev/tty1 2>&1
$ sudo raspi-config
Raspberry Pi camera board :
$ raspistill -o cam.jpg
$ fswebcam cam.jpg
http://www.cooking-hacks.com/documentation/tutorials/raspberry-pi-gprs-gsm-quadband-sim900
Connexion au modem :
$ minicom -b 115200 -D /dev/ttyAMA0
Command			Response	Description
------- 		--------        -----------

ATD*********;	 			********* is the number to call.
ATA			OK		Answer an incoming call.
ATH			OK		Cancel voice calls.

AT+CMGF=		OK		Specifies the input and output format of the short messages. 0 for PDU mode and 1 for text mode.
AT+CMGS	 				Sends a message.
AT+CMGR=*	 			Reads a message. * is the number of the message.

AT+SAPBR		OK		Configures GPRS profile.
AT+FTPCID=1		OK		Selects profile 1 for FTP.
AT+FTPSERV=”****” 	OK		Sets FTP server domain name or IP address. **** is the domain name or the IP.
AT+FTPPORT=***		OK		Sets FTP server port. *** is the port.
AT+FTPUN=”***”		OK		Sets user name for FTP server access. *** is the user name.
AT+FTPPW=”***”		OK		Sets password for FTP server access. *** is the password.
AT+FTPPUTNAME="****"	OK		Sets destiny name for the file.*** is the name of the file.
AT+FTPPUTPATH="****"	OK		Sets destiny file path. *** is the path of the file.
AT+FTPPUT		OK		Use to put a file into the FTP server.
AT+FTPGETNAME="****"	OK		Sets origin name for the file.*** is the name of the file.
AT+FTPGETPATH="****"	OK		Sets origin file path. *** is the path of the file.
AT+FTPGET	 			Use to get a file into the FTP server.

AT+CIPMUX=		OK		Selects single connection (0) or multiple connection (1)
AT+CSTT="myAPN"		OK		Sets APN
AT+CIICR	 			Brings up wireless connection
AT+CIFSR	 			Get local IP address
AT+CIPSTART	 			Establishes a connection with a server.
AT+CIPSEND	 			Sends data when the a connection is established.
AT+CIPCLOSE	 			Closes the connection

AT+SAPBR		OK		Configures GPRS profile
AT+HTTPINIT		OK		Initializes HTTP service
AT+HTTPPARA		OK		Configures HTTP parameters
AT+HTTPACTION=0		OK		Sets HTTP Method Action , GET in this chase.
AT+HTTPREAD	 			Reads HTTP data
AT+HTTPTERM		OK		Closes the opened HTTP session.
/*
*  Copyright (C) 2012 Libelium Comunicaciones Distribuidas S.L.
*  http://www.libelium.com
*
*  This program is free software: you can redistribute it and/or modify
*  it under the terms of the GNU General Public License as published by
*  the Free Software Foundation, either version 3 of the License, or
*  (at your option) any later version.
*
*  This program is distributed in the hope that it will be useful,
*  but WITHOUT ANY WARRANTY; without even the implied warranty of
*  MERCHANTABILITY or FITNESS FOR A PARTICULAR PURPOSE.  See the
*  GNU General Public License for more details.
*
*  You should have received a copy of the GNU General Public License
*  along with this program.  If not, see .
*
*  Version 0.1
*  Author: Alejandro Gállego
*/

//Include ArduPi library
#include "arduPi.h"


void switchModule();

int led = 9;
int onModulePin = 2;        // the pin to switch on the module (without press on button)

int timesToSend = 1;        // Numbers of SMS to send
int count = 0;

char phone_number[]="0637127796";     // ********* is the number to call

void out (const char *s)
{
    printf ("%s", s);
    Serial.print (s);
}

void switchModule(){
    digitalWrite(onModulePin,HIGH);
    delay(2000);
    digitalWrite(onModulePin,LOW);
}

void setup(){

    // Serial.begin(115200);                // UART baud rate
    Serial.begin(19200);
    delay(2000);
    pinMode(led, OUTPUT);
    pinMode(onModulePin, OUTPUT);
    switchModule();                    // switches the module ON

    for (int i=0;i < 5;i++){
        delay(5000);
    }

    // delay(5000);

    out("AT+CMGF=1\r\n");         // sets the SMS mode to text
    delay(100);
}

void loop(){

    while (count < timesToSend){
        delay(1500);
        out("AT+CMGS=\"");     // send the SMS number
        out(phone_number);
        out("\"\r\n");
        while(Serial.read()!='>');
        out("Hola caracola...");     // the SMS body
        delay(500);
        Serial.write(0x1A);       //sends ++
        Serial.write(0x0D);
        Serial.write(0x0A);
	printf("Sent.\n");
        delay(5000);

        count++;
    }
}

int main (){
	printf ("Setup...\n");
	setup();
	printf ("Loop...\n");
	// while(1){
		loop();
	// }
	return (0);
}
$ g++ -o send_sms send_sms.cpp arduPi.cpp -lrt
$ sudo ./send_sms
Tutoriel : http://stackoverflow.com/questions/25301229/raspberry-pi-sim900-default-internet-access
Some notes before start:
Make sure the power supply you used for raspberrypi is exact 5V and it can provide at-least 2A current without voltage drop-out.The SIM900 power-source must be 3.3V 2A
Set the SIM900 baud rate to 115200 via: AT+IPR=115200
$ screen /dev/ttyAMA0 115200 type AT<enter> it will echo: OK. Hit ctrl+a k y to exit./etc/ppp/options-mobile
ttyAMA0
115200
lock
crtscts
modem
passive
novj
defaultroute
replacedefaultroute
noipdefault
usepeerdns
noauth
hide-password
persist
holdoff 10
maxfail 0
debug
Create the /etc/ppp/peers directory:
$ mkdir /etc/ppp/peers
$ cd /etc/ppp/peers
/etc/ppp/peers/mobile-auth
file /etc/ppp/options-mobile
user "your_usr"
password "your_pass"
connect "/usr/sbin/chat -v -t15 -f /etc/ppp/chatscripts/mobile-modem.chat"
/etc/ppp/peers/mobile-noauth
file /etc/ppp/options-mobile
connect "/usr/sbin/chat -v -t15 -f /etc/ppp/chatscripts/mobile-modem.chat"
Create the /etc/ppp/chatscripts directory:
$ mkdir /etc/ppp/chatscripts
/etc/ppp/chatscripts/mobile-modem.chat
ABORT 'BUSY'
ABORT 'NO CARRIER'
ABORT 'VOICE'
ABORT 'NO DIALTONE'
ABORT 'NO DIAL TONE'
ABORT 'NO ANSWER'
ABORT 'DELAYED'
REPORT CONNECT
TIMEOUT 6
'' 'ATQ0'
'OK-AT-OK' 'ATZ'
TIMEOUT 3
'OK' @/etc/ppp/chatscripts/pin
'OK\d-AT-OK' 'ATI'
'OK' 'ATZ'
'OK' 'ATQ0 V1 E1 S0=0 &C1 &D2 +FCLASS=0'
'OK' @/etc/ppp/chatscripts/mode
'OK-AT-OK' @/etc/ppp/chatscripts/apn
'OK' 'ATDT*99***1#'
TIMEOUT 30
CONNECT ''
/etc/ppp/chatscripts/my-operator-apn
AT+CGDCONT=1,"IP","<apn-name>"
/etc/ppp/chatscripts/pin.CODE
AT+CPIN=1234
/etc/ppp/chatscripts/pin.NONE
AT
/etc/ppp/chatscripts/mode.3G-only
AT\^SYSCFG=14,2,3fffffff,0,1
/etc/ppp/chatscripts/mode.3G-pref
AT\^SYSCFG=2,2,3fffffff,0,1
/etc/ppp/chatscripts/mode.GPRS-only
AT\^SYSCFG=13,1,3fffffff,0,0
/etc/ppp/chatscripts/mode.GPRS-pref
AT\^SYSCFG=2,1,3fffffff,0,0
- The SYSCFG line in the mode.* files is device-dependent, and likely Huawei-specific, So You may use the
mode.NONEfile if your modem is SIM900. *
/etc/ppp/chatscripts/mode.NONE
AT
Make some symbolic links:
$ ln -s /etc/ppp/chatscripts/my-operator-apn /etc/ppp/chatscripts/apn
$ ln -s /etc/ppp/chatscripts/mode.NONE /etc/ppp/chatscripts/mode
$ ln -s /etc/ppp/chatscripts/pin.NONE /etc/ppp/chatscripts/pin
If you have to enter credentials use mobile-auth
$ mv provider provider.example
$ ln -s /etc/ppp/peers/mobile-noauth /etc/ppp/peers/provider
Check syslog in another console:
$ tail -f /var/log/syslog | grep -Ei 'pppd|chat'
Finally issue the pon command to see the result:
$ pon
The base instruction : https://wiki.archlinux.org/index.php/3G_and_GPRS_modems_with_pppd
Attention ! Les fichiers de configuration contenant des commandes AT ne doivent pas contenir de ligne vide même à la fin.
$ ln -s /etc/ppp/peers/mobile-noauth /etc/ppp/peers/provider
AT+CGDCONT=1,"IP","ebouygtel.com"
$ ln -s /etc/ppp/chatscripts/bouygues-apn /etc/ppp/chatscripts/apn
file /etc/ppp/options-mobile
user "orange"
password "orange"
connect "/usr/sbin/chat -v -t15 -f /etc/ppp/chatscripts/mobile-modem.chat"
$ ln -s /etc/ppp/peers/mobile-auth /etc/ppp/peers/provider
AT+CGDCONT=1,"IP","orange"
$ ln -s /etc/ppp/chatscripts/orange-apn /etc/ppp/chatscripts/apn
$ sudo pon
$ plog
$ sudo poff
Pour les autres modèles de modems, vous pouvez trouver des informations ici : http://www.draisberghof.de/usb_modeswitch/device_reference.txt
Initialement le dongle est reconnu comme un CD-ROM contenant les fichiers de configuration pour Windows. Il faut donc le configurer pour qu'il soit reconnu comme un modem USB.
pi@raspberrypi ~ $ lsusb
Bus 001 Device 007: ID 2357:f000
pi@raspberrypi ~ $
pi@raspberrypi ~ $ sudo apt-get install ppp usb-modeswitch wvdial
# Configuration for the usb_modeswitch package, a mode switching tool for
# USB devices providing multiple states or modes
#
# Evaluated by the wrapper script /usr/sbin/usb_modeswitch_dispatcher
#
# To enable an option, set it to "1", "yes" or "true" (case doesn't matter)
# Everything else counts as "disable"


# Disable automatic mode switching globally (e.g. to access the original
# install storage)

DisableSwitching=0


# Enable logging (results in a extensive report file in /var/log, named
# "usb_modeswitch_" and probably others

EnableLogging=0

#######################################################
# TP-Link MA260
#
# Contributor: Bjørn Mork

DefaultVendor= 0x2357
DefaultProduct=0xf000

TargetVendor=  0x2357
TargetProduct= 0x9000

MessageContent="5553424312345678000000000000061b000000020000000000000000000000"


#######################################################
pi@raspberrypi ~ $ sudo usb_modeswitch -W -c /etc/usb_modeswitch.conf
pi@raspberrypi ~ $
# TP-Link MA260 ATTRS{idVendor}=="2357", ATTRS{idProduct}=="f000", RUN+="usb_modeswitch '%b/%k' -V 2357 -p 0xf000 -P 0x9000 -M "5553424312345678000000000000061b00000002000000000 0000000000000"LABEL="modeswitch_rules_end"# TP-Link MA260 ATTRS{idVendor}=="2357", ATTRS{idProduct}=="f000", RUN+="/usr/bin/eject -s %N"
pi@raspberrypi ~ $ sudo udevadm control --reload-rules
pi@raspberrypi ~ $
pi@raspberrypi ~ $ lsusb
(...)
Bus 001 Device 007: ID 2357:9000
pi@raspberrypi ~ $ ls /dev/ttyUSB*
/dev/ttyUSB0  /dev/ttyUSB1  /dev/ttyUSB2
pi@raspberrypi ~ $
Si l'identifiant produit reste à f000, tapez la commande :
pi@raspberrypi ~ $ sudo usb_modeswitch -v 2357 -p f000 -V 2357 -P 9000 -W -I -n -M '5553424312345678000000000000061e000000000000000000000000000000' -2 '5553424312345678000000000000061b000000020000000000000000000000'
pi@raspberrypi ~ $ su
Mot de passe :
root@raspberrypi:/home/pi# sudo modprobe -a option
root@raspberrypi:/home/pi# echo "0x2357 0x9000" > /sys/bus/usb-serial/dirvers/option1/new_id
root@raspberrypi:/home/pi# exit
pi@raspberrypi ~ $
pi@raspberrypi ~ $ minicom -b 115200 -D /dev/ttyUSB2
Bienvenue avec minicom 2.6.1

OPTIONS: I18n
Compilé le Apr 28 2012, 19:24:31.
Port /dev/ttyUSB2

Tapez CTRL-A Z pour voir l'aide concernant les touches+------------------------------------+
                                                      |   Quitter sans remettre à zéro ?   |
AT                                                    |            Oui       Non           |
OK                                                    +------------------------------------+
^AQ
pi@raspberrypi ~ $
Autre possibilité : connexion avec wvdial. Créer le fichier /etc/wvdial.conf avec le contenu suivant (exemple pour Orange, remplacez éventuellement l'username, le password et l'APN ebouygtel. par les paramètres correspondant à votre opérateur).
[Dialer Defaults]
Modem Type = Analog Modem
Stupid Mode = 1
ISDN = 0
New PPPD = yes
Phone = *99#
Modem = /dev/ttyUSB2
Username = 'orange';
Password = 'orange';
Baud = 460800

Init1 = ATZ
Init2 = ATQ0 V1 E1 S0=0 &C1 &D2 +FCLASS=0
# Orange :
Init3 = AT+CGDCONT=1,"IP","orange"
#Init4 = AT$QCPDPP=1,1,"orange","orange"


[Dialer pin]
Modem Type = Analog Modem
Stupid Mode = 1
ISDN = 0
New PPPD = yes
Phone = *99#
Modem = /dev/ttyUSB2
Baud = 460800
Init1 = AT+CPIN=0000
pi@raspberrypi /etc $ sudo wvdial
--> WvDial: Internet dialer version 1.61
--> Initializing modem.
--> Sending: ATZ
ATZ
OK
--> Sending: ATQ0 V1 E1 S0=0 &C1 &D2 +FCLASS=0
ATQ0 V1 E1 S0=0 &C1 &D2 +FCLASS=0
OK
--> Sending: AT+CGDCONT=1,"IP","orange"
AT+CGDCONT=1,"IP","orange"
OK
--> Modem initialized.
--> Sending: ATDT*99#
--> Waiting for carrier.
ATDT*99#
CONNECT
--> Carrier detected.  Starting PPP immediately.
--> Starting pppd at Thu Feb  5 13:44:01 2015
--> Pid of pppd: 5003
--> Using interface ppp0
--> pppd: 0y*[01]
--> pppd: 0y*[01]
--> pppd: 0y*[01]
--> pppd: 0y*[01]
--> pppd: 0y*[01]
--> pppd: 0y*[01]
--> local  IP address 10.126.196.188
--> pppd: 0y*[01]
--> remote IP address 10.64.64.64
--> pppd: 0y*[01]
--> primary   DNS address 192.168.10.110
--> pppd: 0y*[01]
pi@raspberrypi ~ $ ifconfig
(...)
ppp0      Link encap:Protocole Point-à-Point
          inet adr:10.126.196.188  P-t-P:10.64.64.64  Masque:255.255.255.255
          UP POINTOPOINT RUNNING NOARP MULTICAST  MTU:1500  Metric:1
          RX packets:8 errors:0 dropped:0 overruns:0 frame:0
          TX packets:9 errors:0 dropped:0 overruns:0 carrier:0
          collisions:0 lg file transmission:3
          RX bytes:152 (152.0 B)  TX bytes:209 (209.0 B)
(...)
pi@raspberrypi ~ $ sudo ip route replace default via 10.64.64.64 dev ppp0
pi@raspberrypi ~ $ ping www.google.fr
PING www.google.fr (173.194.66.94) 56(84) bytes of data.
64 bytes from we-in-f94.1e100.net (173.194.66.94): icmp_req=1 ttl=44 time=539 ms
64 bytes from we-in-f94.1e100.net (173.194.66.94): icmp_req=2 ttl=44 time=309 ms
64 bytes from we-in-f94.1e100.net (173.194.66.94): icmp_req=3 ttl=44 time=558 ms
^C
--- www.google.fr ping statistics ---
4 packets transmitted, 3 received, 25% packet loss, time 2999ms
rtt min/avg/max/mdev = 309.232/469.074/558.955/113.317 ms
pi@raspberrypi ~ $
pi@raspberrypi ~ $ lsusb
(...)
Bus 001 Device 006: ID 12d1:1003 Huawei Technologies Co., Ltd. E220 HSDPA Modem / E230/E270/E870 HSDPA/HSUPA Modem
pi@raspberrypi ~ $ ls /dev/ttyUSB*
/dev/ttyUSB0  /dev/ttyUSB1
pi@raspberrypi ~ $
Exemple de fichier /etc/wvdial.conf pour Huawei E220 avec Bouygues :
[Dialer Defaults]
Modem Type = Analog Modem
Stupid Mode = 1
ISDN = 0
New PPPD = yes
Phone = *99#
Modem = /dev/ttyUSB0
Username = 'guest';
Password = 'guest';
Baud = 460800

Init1 = ATZ
Init2 = ATQ0 V1 E1 S0=0 &C1 &D2 +FCLASS=0
# Bouygues :
Init3 = AT+CGDCONT=1,"IP","ebouygtel.com"
#Init4 = AT$QCPDPP=1,1,"orange","orange"


[Dialer pin]
Modem Type = Analog Modem
Stupid Mode = 1
ISDN = 0
New PPPD = yes
Phone = *99#
Modem = /dev/ttyUSB2
Baud = 460800
Init1 = AT+CPIN=0000
Voir :
$ sudo apt-get update && sudo apt-get install ca-certificates
$ sudo apt-get install isc-dhcp-server
$ sudo apt-get install hostapd bridge-utils iw
$ sudo apt-get install dnsmasq
(...)
allow-hotplug wlan0
iface wlan0 inet static
address 192.168.42.1
netmask 255.255.255.0

#auto br0
#iface br0 inet dhcp
#        bridge_fd 1
#        bridge_hello 3
#        bridge_maxage 10
#        bridge_stp off
#        bridge_ports ppp0 wlan0

pre-up iptables-restore < /etc/iptables.ipv4.nat
INTERFACES="wlan0"
(...)
# option domain-name "example.org";
# option domain-name-servers ns1.example.org, ns2.example.org;
(...)
authoritative;
(...)
subnet 192.168.42.0 netmask 255.255.255.0 {
range 192.168.42.10 192.168.42.50;
option broadcast-address 192.168.42.255;
option routers 192.168.42.1;
default-lease-time 600;
max-lease-time 7200;
option domain-name "local";
option domain-name-servers 8.8.8.8, 8.8.4.4;
interface wlan0;
}
$ cd /usr/sbin
$ sudo mv hostapd hostapd_std
$ sudo wget http://dl.dropbox.com/u/1663660/hostapd/hostapd
(...)
$ sudo chown root:root hostapd
$ sudo chmod 755 hostapd
DAEMON_CONF="/etc/hostapd/hostapd.conf"
interface=wlan0
bridge=br0
driver=rtl871xdrv
country_code=FR
ctrl_interface=wlan0
ctrl_interface_group=0
ssid=RPiAP
hw_mode=g
channel=1
#wpa=3
#wpa_passphrase=PASSWORD
#wpa_key_mgmt=WPA-PSK
#wpa_pairwise=TKIP
#rsn_pairwise=CCMP
beacon_int=100
#auth_algs=3
auth_algs=1
macaddr_acl=0
wmm_enabled=1
eap_reauth_period=360000000
Tapez ensuite les commandes suivantes pour créer les tables de routage :
$ sudo sh -c "echo 1 > /proc/sys/net/ipv4/ip_forward"
$ sudo iptables -t nat -A POSTROUTING -o eth0 -j MASQUERADE
$ sudo iptables -A FORWARD -i eth0 -o wlan0 -m state --state RELATED,ESTABLISHED -j ACCEPT
$ sudo iptables -A FORWARD -i wlan0 -o eth0 -j ACCEPT
$ sudo sh -c "iptables-save > /etc/iptables.ipv4.nat"
Tapez "ifconfig" et si l'adresse ip n'apparait pas pour wlan0, redémarrez wlan0 avec "sudo ifdown wlan0 && sudo ifup wlan0".
Connectez le modem Wifi (voir "Connexion internet avec un modem USB Huawei E220").
Démarrez les services :
$ sudo service isc-dhcp-server restart
$ sudo sysctl -w net.ipv4.ip_forward=1
$ sudo iptables -t nat -A POSTROUTING -j MASQUERADE
$ sudo hostapd -d /etc/hostapd/hostapd.conf
Vous pouvez créer un script de démarrage /ur/local/bin/hotspot :
#!/bin/sh
echo "Restarting wlan0..."
ifdown wlan0
ifup wlan0
echo "Restarting DHCP server..."
service isc-dhcp-server restart
echo "Forwarding..."
sysctl -w net.ipv4.ip_forward=1
iptables -t nat -A POSTROUTING -j MASQUERADE
echo "Starting access point..."
hostapd -d /etc/hostapd/hostapd.conf >/dev/null 2>/dev/null &
echo "Done."
$ sudo chmod a+rx /usr/local/bin/hotspot
1. Install the necessary software.
sudo apt-get install hostapd udhcpd
2. Configure DHCP. Edit the file /etc/udhcpd.conf and configure it like this:
start 192.168.42.2 # This is the range of IPs that the hostspot will give to client devices.
end 192.168.42.20
interface wlan0 # The device uDHCP listens on.
remaining yes
opt dns 8.8.8.8 4.2.2.2 # The DNS servers client devices will use.
opt subnet 255.255.255.0
opt router 192.168.42.1 # The Pi's IP address on wlan0 which we will set up shortly.
opt lease 864000 # 10 day DHCP lease time in seconds
Edit the file /etc/default/udhcpd and change the line:
DHCPD_ENABLED="no"
to
#DHCPD_ENABLED="no"
You will need to give the Pi a static IP address with the following command:
sudo ifconfig wlan0 192.168.42.1
To set this up automatically on boot, edit the file /etc/network/interfaces and replace the line "iface wlan0 inet dhcp" to:
iface wlan0 inet static
  address 192.168.42.1
  netmask 255.255.255.0
If the line "iface wlan0 inet dhcp" is not present, add the above lines to the bottom of the file.
Change the lines (they probably won't all be next to each other):
allow-hotplug wlan0
wpa-roam /etc/wpa_supplicant/wpa_supplicant.conf
iface default inet manual
to:
#allow-hotplug wlan0
#wpa-roam /etc/wpa_supplicant/wpa_supplicant.conf
#iface default inet dhcp
3. Configure HostAPD. You can create an open network, or a WPA-secured network. A secure network is recommended to prevent unauthorized use and tampering, but you can also create an open network. To create a WPA-secured network, edit the file /etc/hostapd/hostapd.conf (create it if it doesn't exist) and add the following lines:
interface=wlan0
driver=nl80211
ssid=My_AP
hw_mode=g
channel=6
macaddr_acl=0
auth_algs=1
ignore_broadcast_ssid=0
wpa=2
wpa_passphrase=My_Passphrase
wpa_key_mgmt=WPA-PSK
wpa_pairwise=TKIP
rsn_pairwise=CCMP
Change ssid=, channel=, and wpa_passphrase= to values of your choice. SSID is the hotspot's name which is broadcast to other devices, channel is what frequency the hotspot will run on, wpa_passphrase is the password for the wireless network. For many, many more options see the file /usr/share/doc/hostapd/examples/hostapd.conf.gz
If you would like to create an open network, put the following text into /etc/hostapd/hostapd.conf:
interface=wlan0
ssid=My_AP
hw_mode=g
channel=6
auth_algs=1
wmm_enabled=0
Change ssid= and channel= to values of your choice. Note that anyone will be able to connect to your network, which is generally not a good idea. Also, some regions will hold an access point's owner responsible for any traffic that passes though an open wireless network, regardless of who actually caused that traffic.
Edit the file /etc/default/hostapd and change the line:
#DAEMON_CONF=""
to:
DAEMON_CONF="/etc/hostapd/hostapd.conf"
4. Configure NAT (Network Address Translation). NAT is a technique that allows several devices to use a single connection to the internet. Linux supports NAT using Netfilter (also known as iptables) and is fairly easy to set up. First, enable IP forwarding in the kernel:
sudo sh -c "echo 1 > /proc/sys/net/ipv4/ip_forward"
To set this up automatically on boot, edit the file /etc/sysctl.conf and add the following line to the bottom of the file:
net.ipv4.ip_forward=1
Second, to enable NAT in the kernel, run the following commands:
sudo iptables -t nat -A POSTROUTING -o eth0 -j MASQUERADE
sudo iptables -A FORWARD -i eth0 -o wlan0 -m state --state RELATED,ESTABLISHED -j ACCEPT
sudo iptables -A FORWARD -i wlan0 -o eth0 -j ACCEPT
These instructions don't give a good solution for rerouting https and for URLs referring to a page inside a domain, like www.nu.nl/38274.htm. The user will see a 404 error. Your Pi is now NAT-ing. To make this permanent so you don't have to run the commands after each reboot, run the following command:
sudo sh -c "iptables-save > /etc/iptables.ipv4.nat"
Now edit the file /etc/network/interfaces and add the following line to the bottom of the file:
up iptables-restore < /etc/iptables.ipv4.nat
5. Fire it up! Run the following commands to start the access point:
sudo service hostapd start
sudo service udhcpd start
Your Pi should now be hosting a wireless hotspot. To get the hotspot to start on boot, run these additional commands:
sudo update-rc.d hostapd enable
sudo update-rc.d udhcpd enable
At the completion of these instructions, your Pi should be providing a wireless network and allowing other devices to connect to the Internet. From my experience, the Pi makes a decent access point, although with cheaper WiFi dongles range will be fairly limited. I haven't stress tested this setup, but it seems to work fairly well and is handy when a "real" access point isn't available. I wrote most of the instructions from memory, if you find any errors/typos I'll correct them.
#!/bin/sh

iptables -F
iptables -t nat -F
iptables -t mangle -F

iptables -A FORWARD -i wlan0 -o ppp0 -j DROP
iptables -t nat -I PREROUTING -i wlan0  -p tcp --dport 80 -j DNAT --to-destination 192.168.42.1:80
iptables -t nat -I PREROUTING -i wlan0  -p tcp --dport 443 -j DNAT --to-destination 192.168.42.1:443
iptables -t nat -I PREROUTING -i wlan0  -p udp --dport 53 -j DNAT --to-destination 192.168.42.1:53

iptables -t mangle -N internet
iptables -t mangle -A PREROUTING -i wlan0 -p tcp -m tcp --dport 80 -j internet
iptables -t mangle -A internet -j MARK --set-mark 99
iptables -t nat -A PREROUTING -i wlan0 -p tcp -m mark --mark 99 -m tcp --dport 80 -j DNAT --to-destination 192.168.42.1

service hostapd restart
service dnsmasq restart
| |
| |
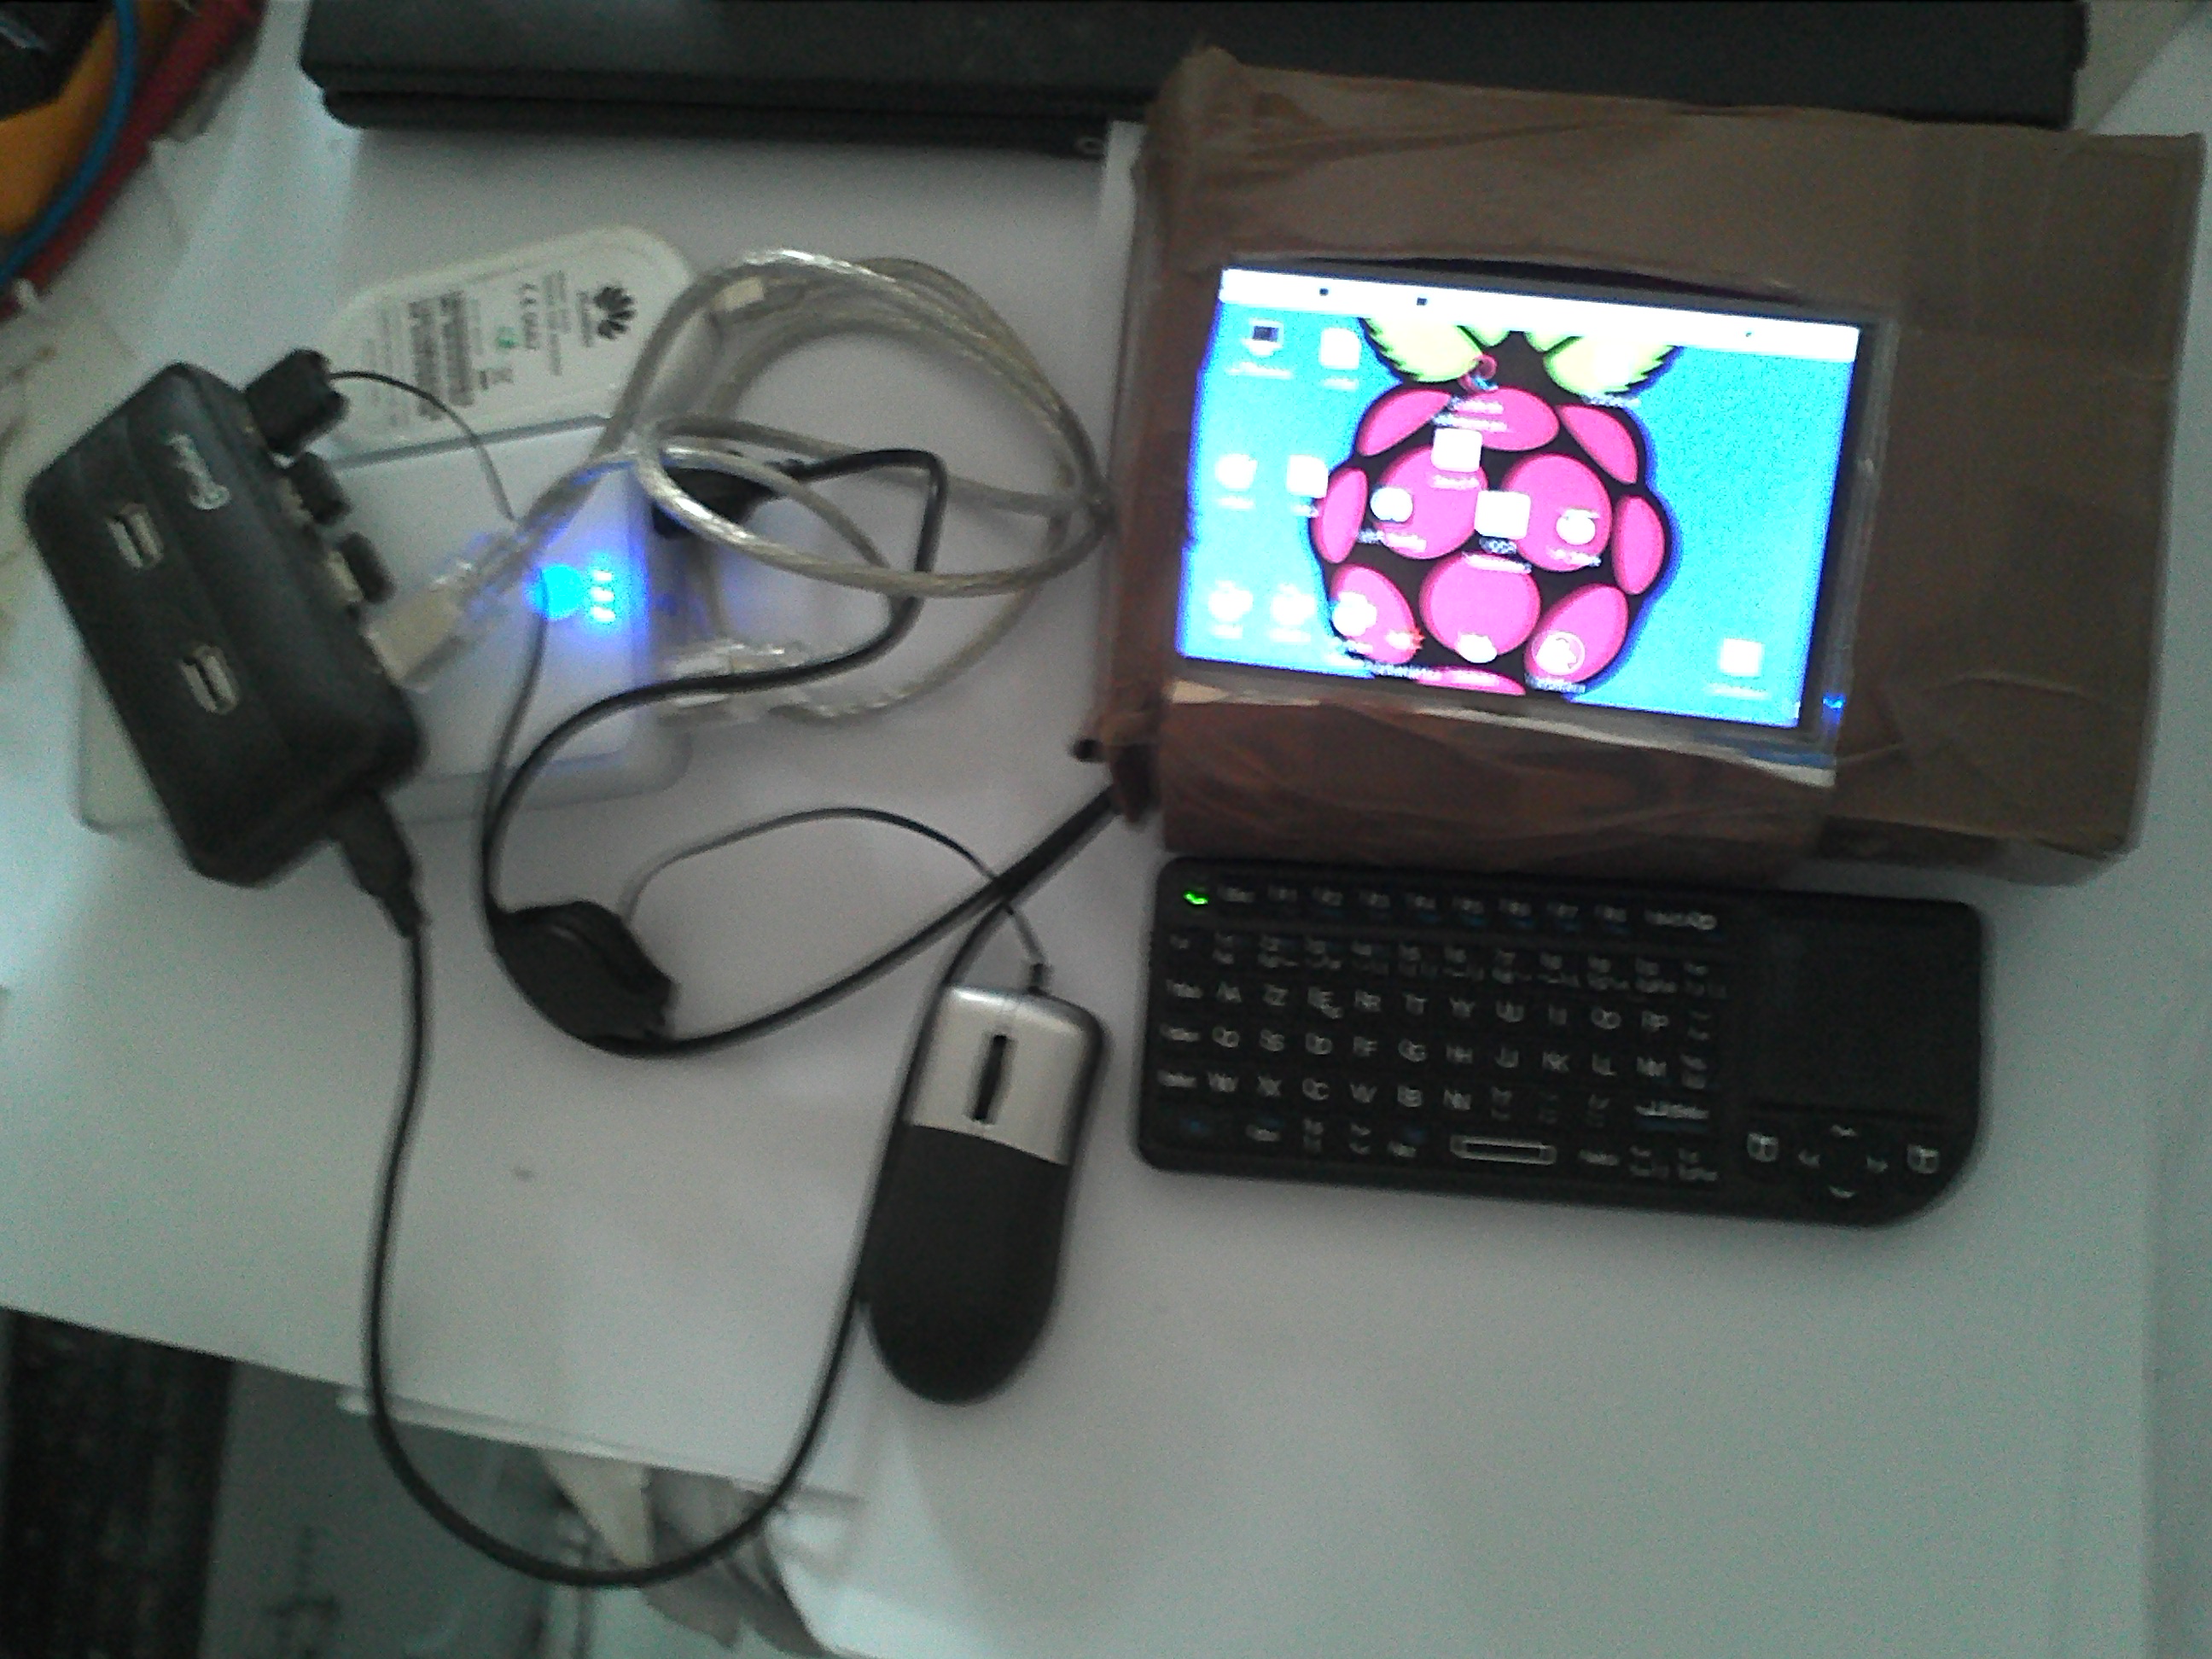
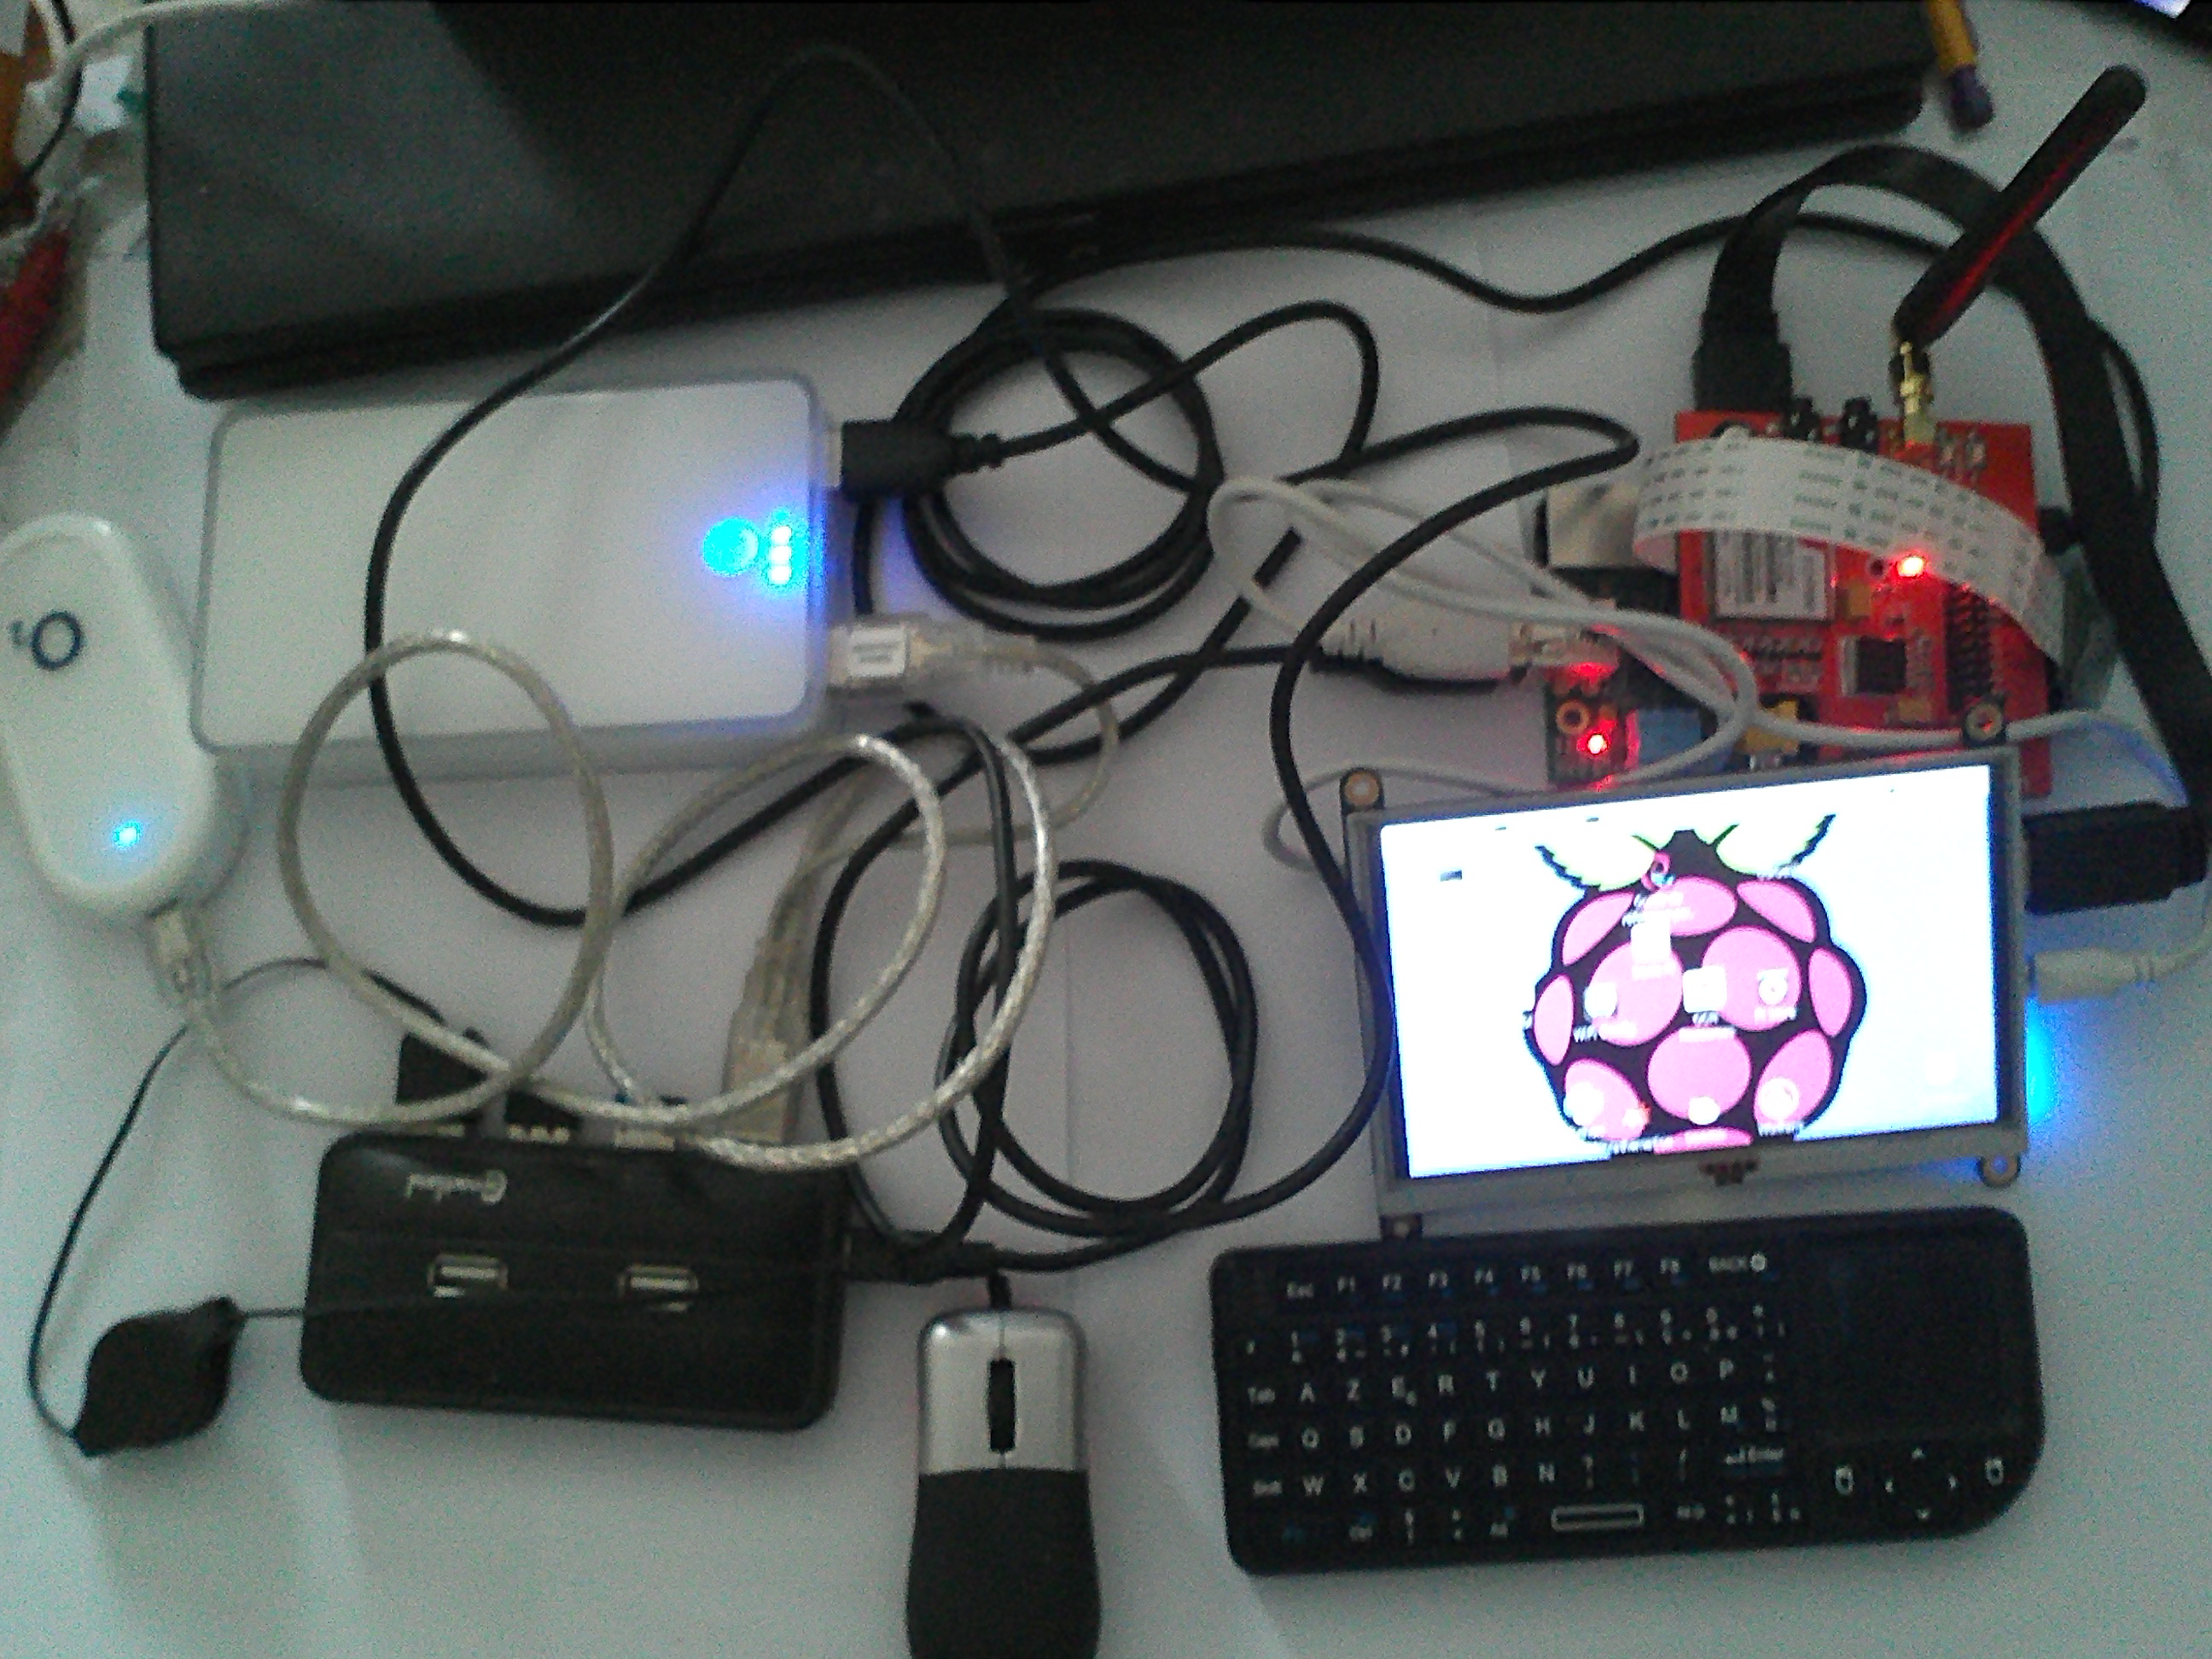
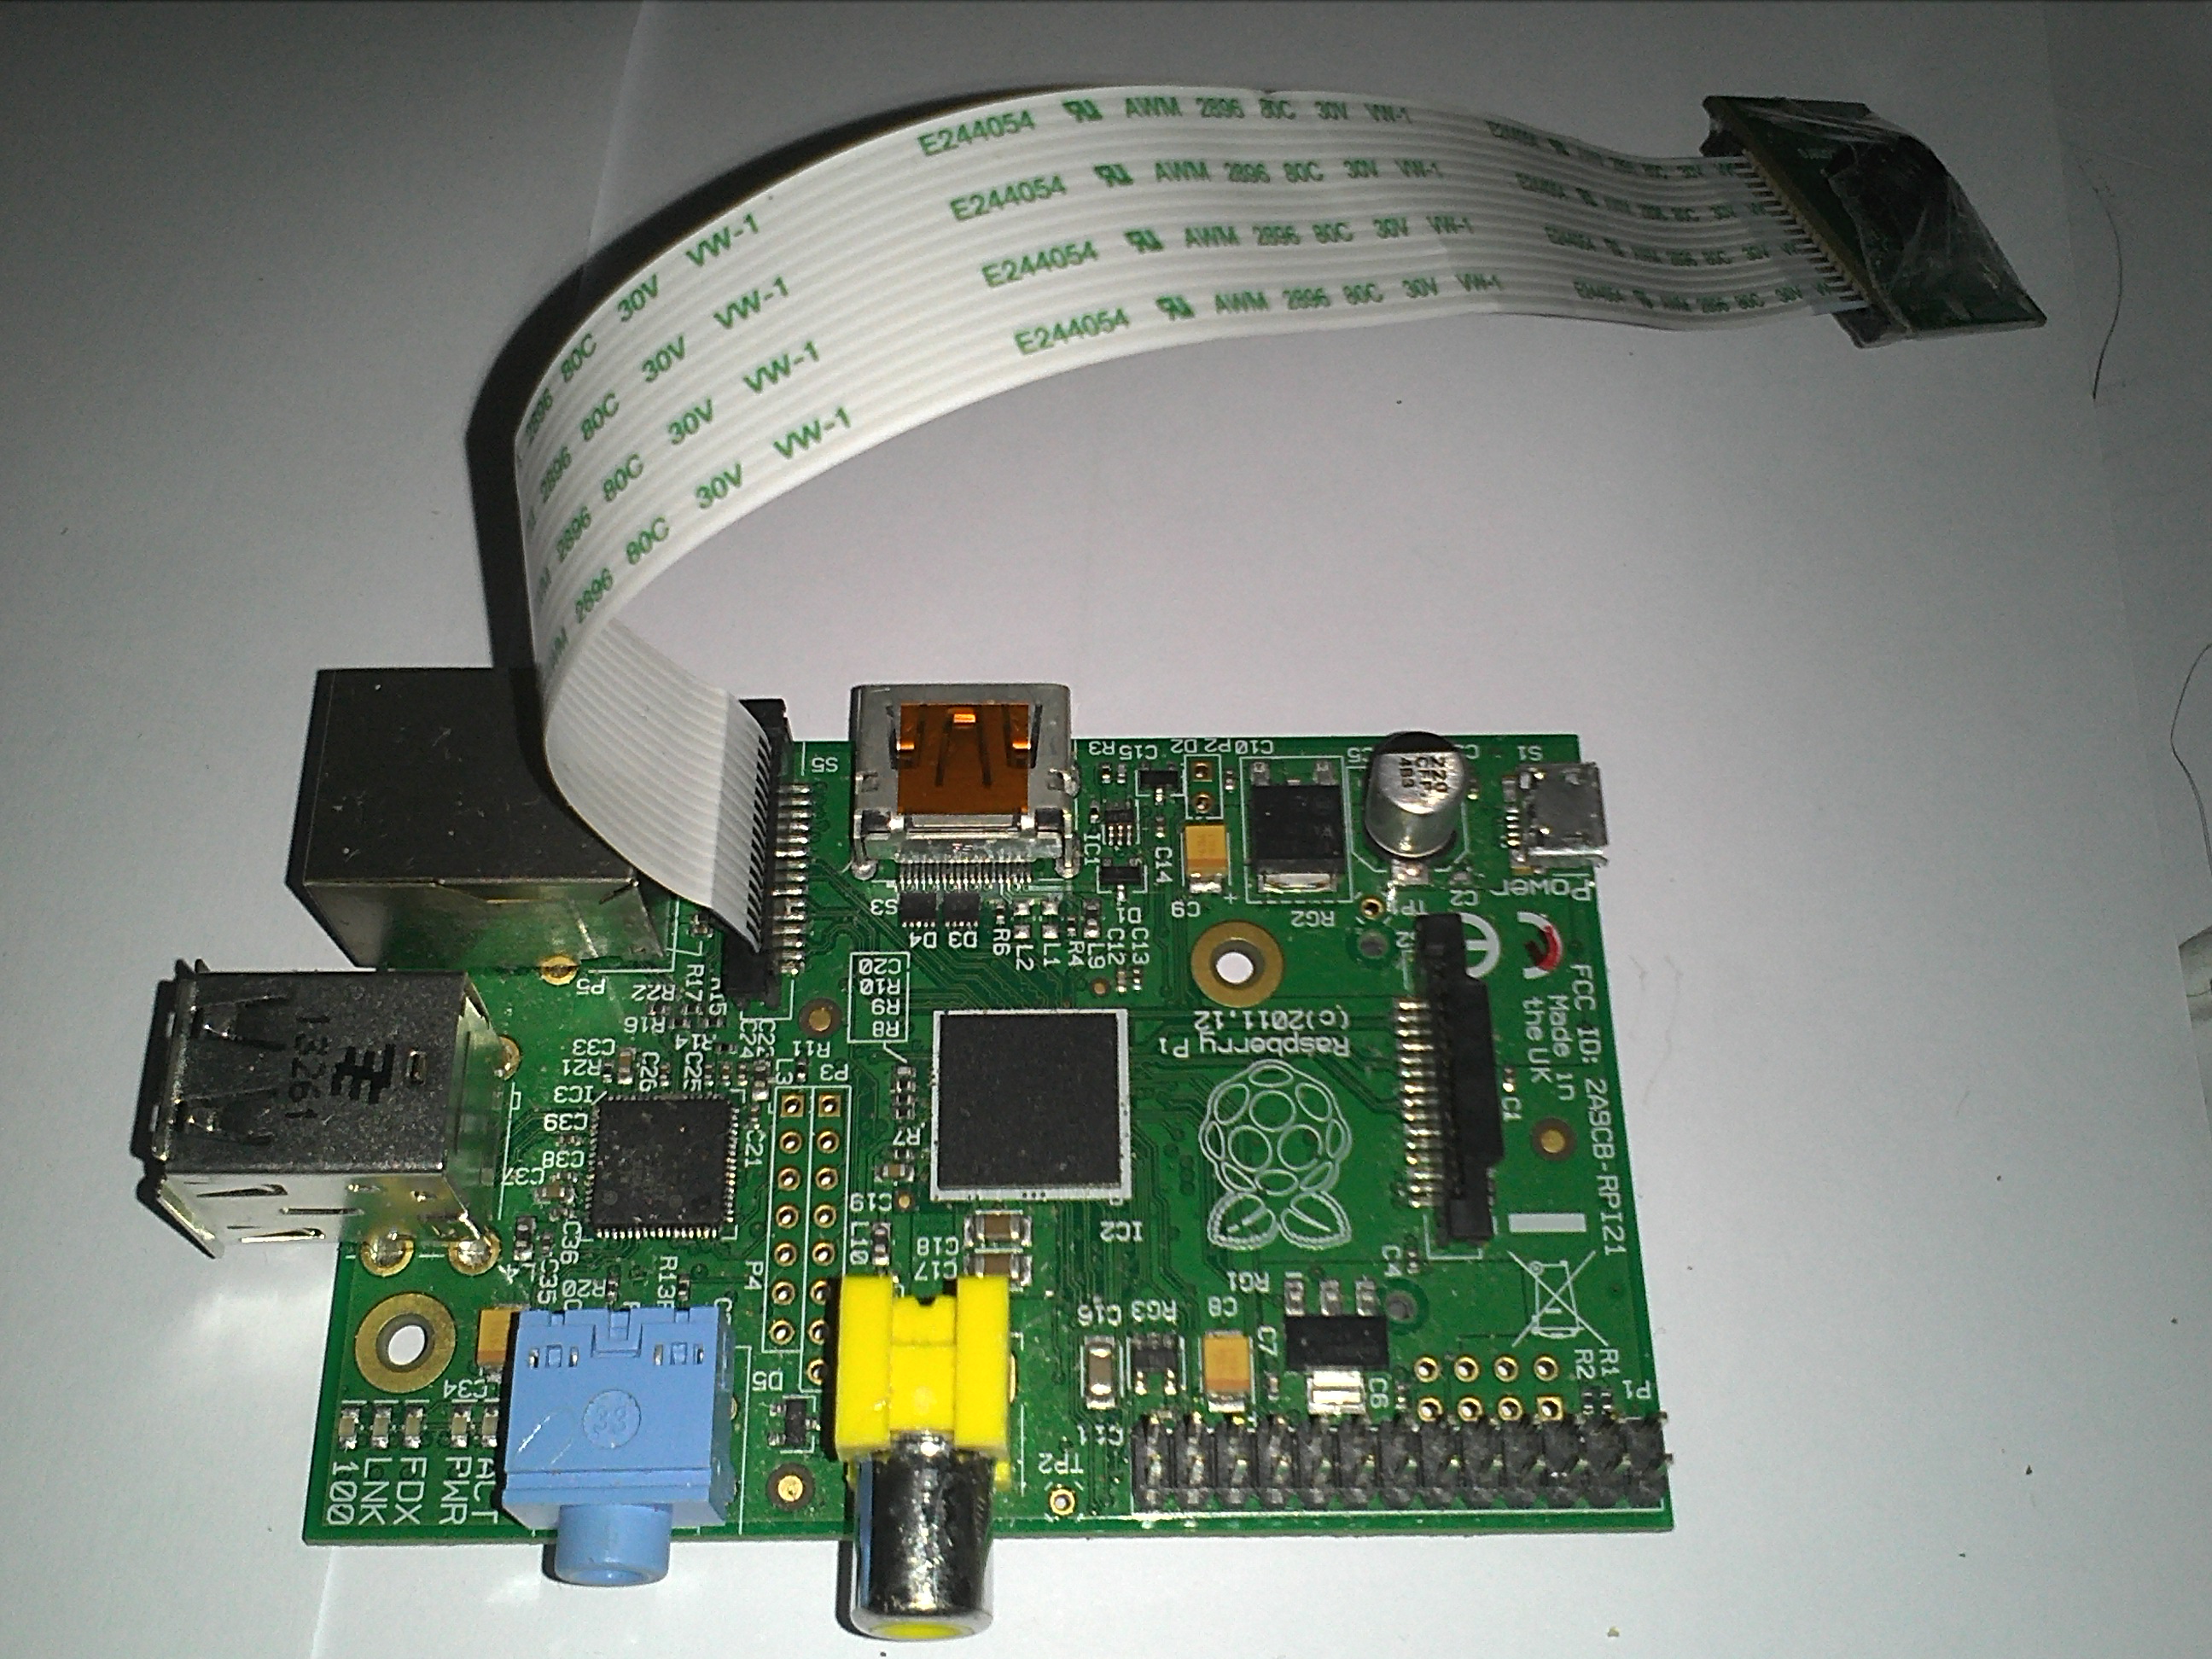
| Raspberry Pi B avec module caméra |
| Carte modem GSM SIM900 http://imall.iteadstudio.com/raspberry-pi-gsm-add-on.html |
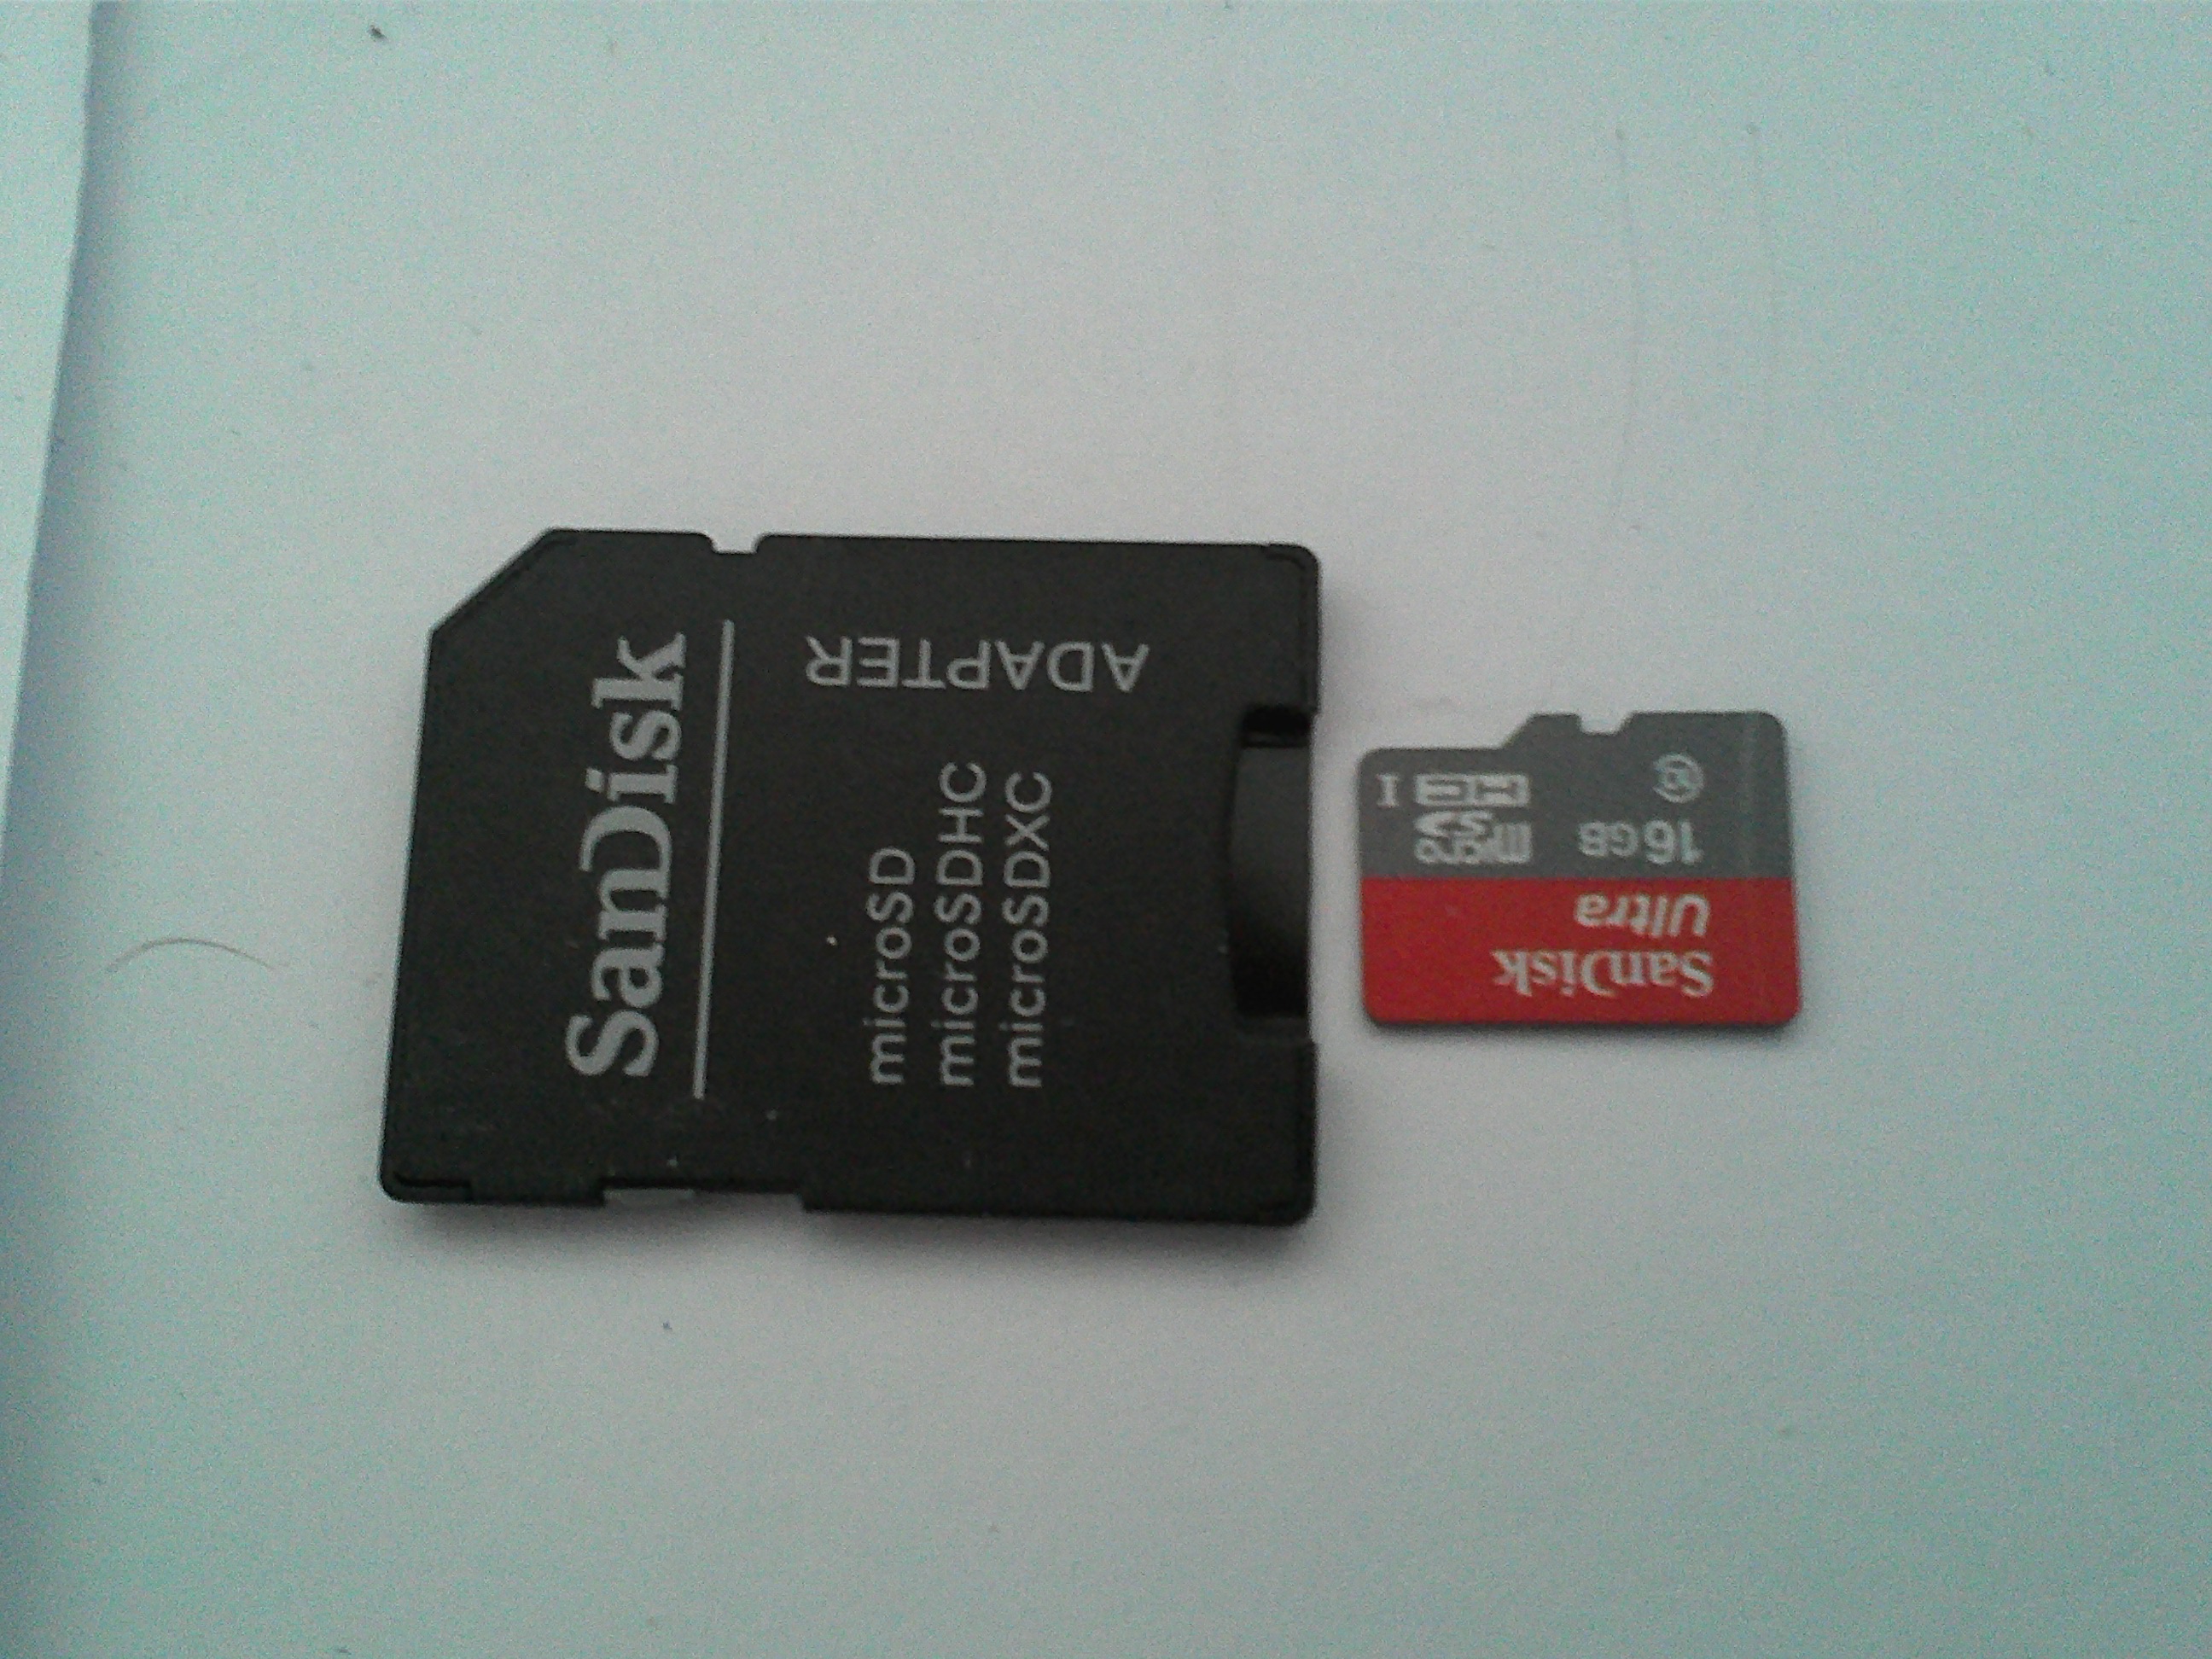
| Carte micro SD avec système Raspbian et adaptateur SD |
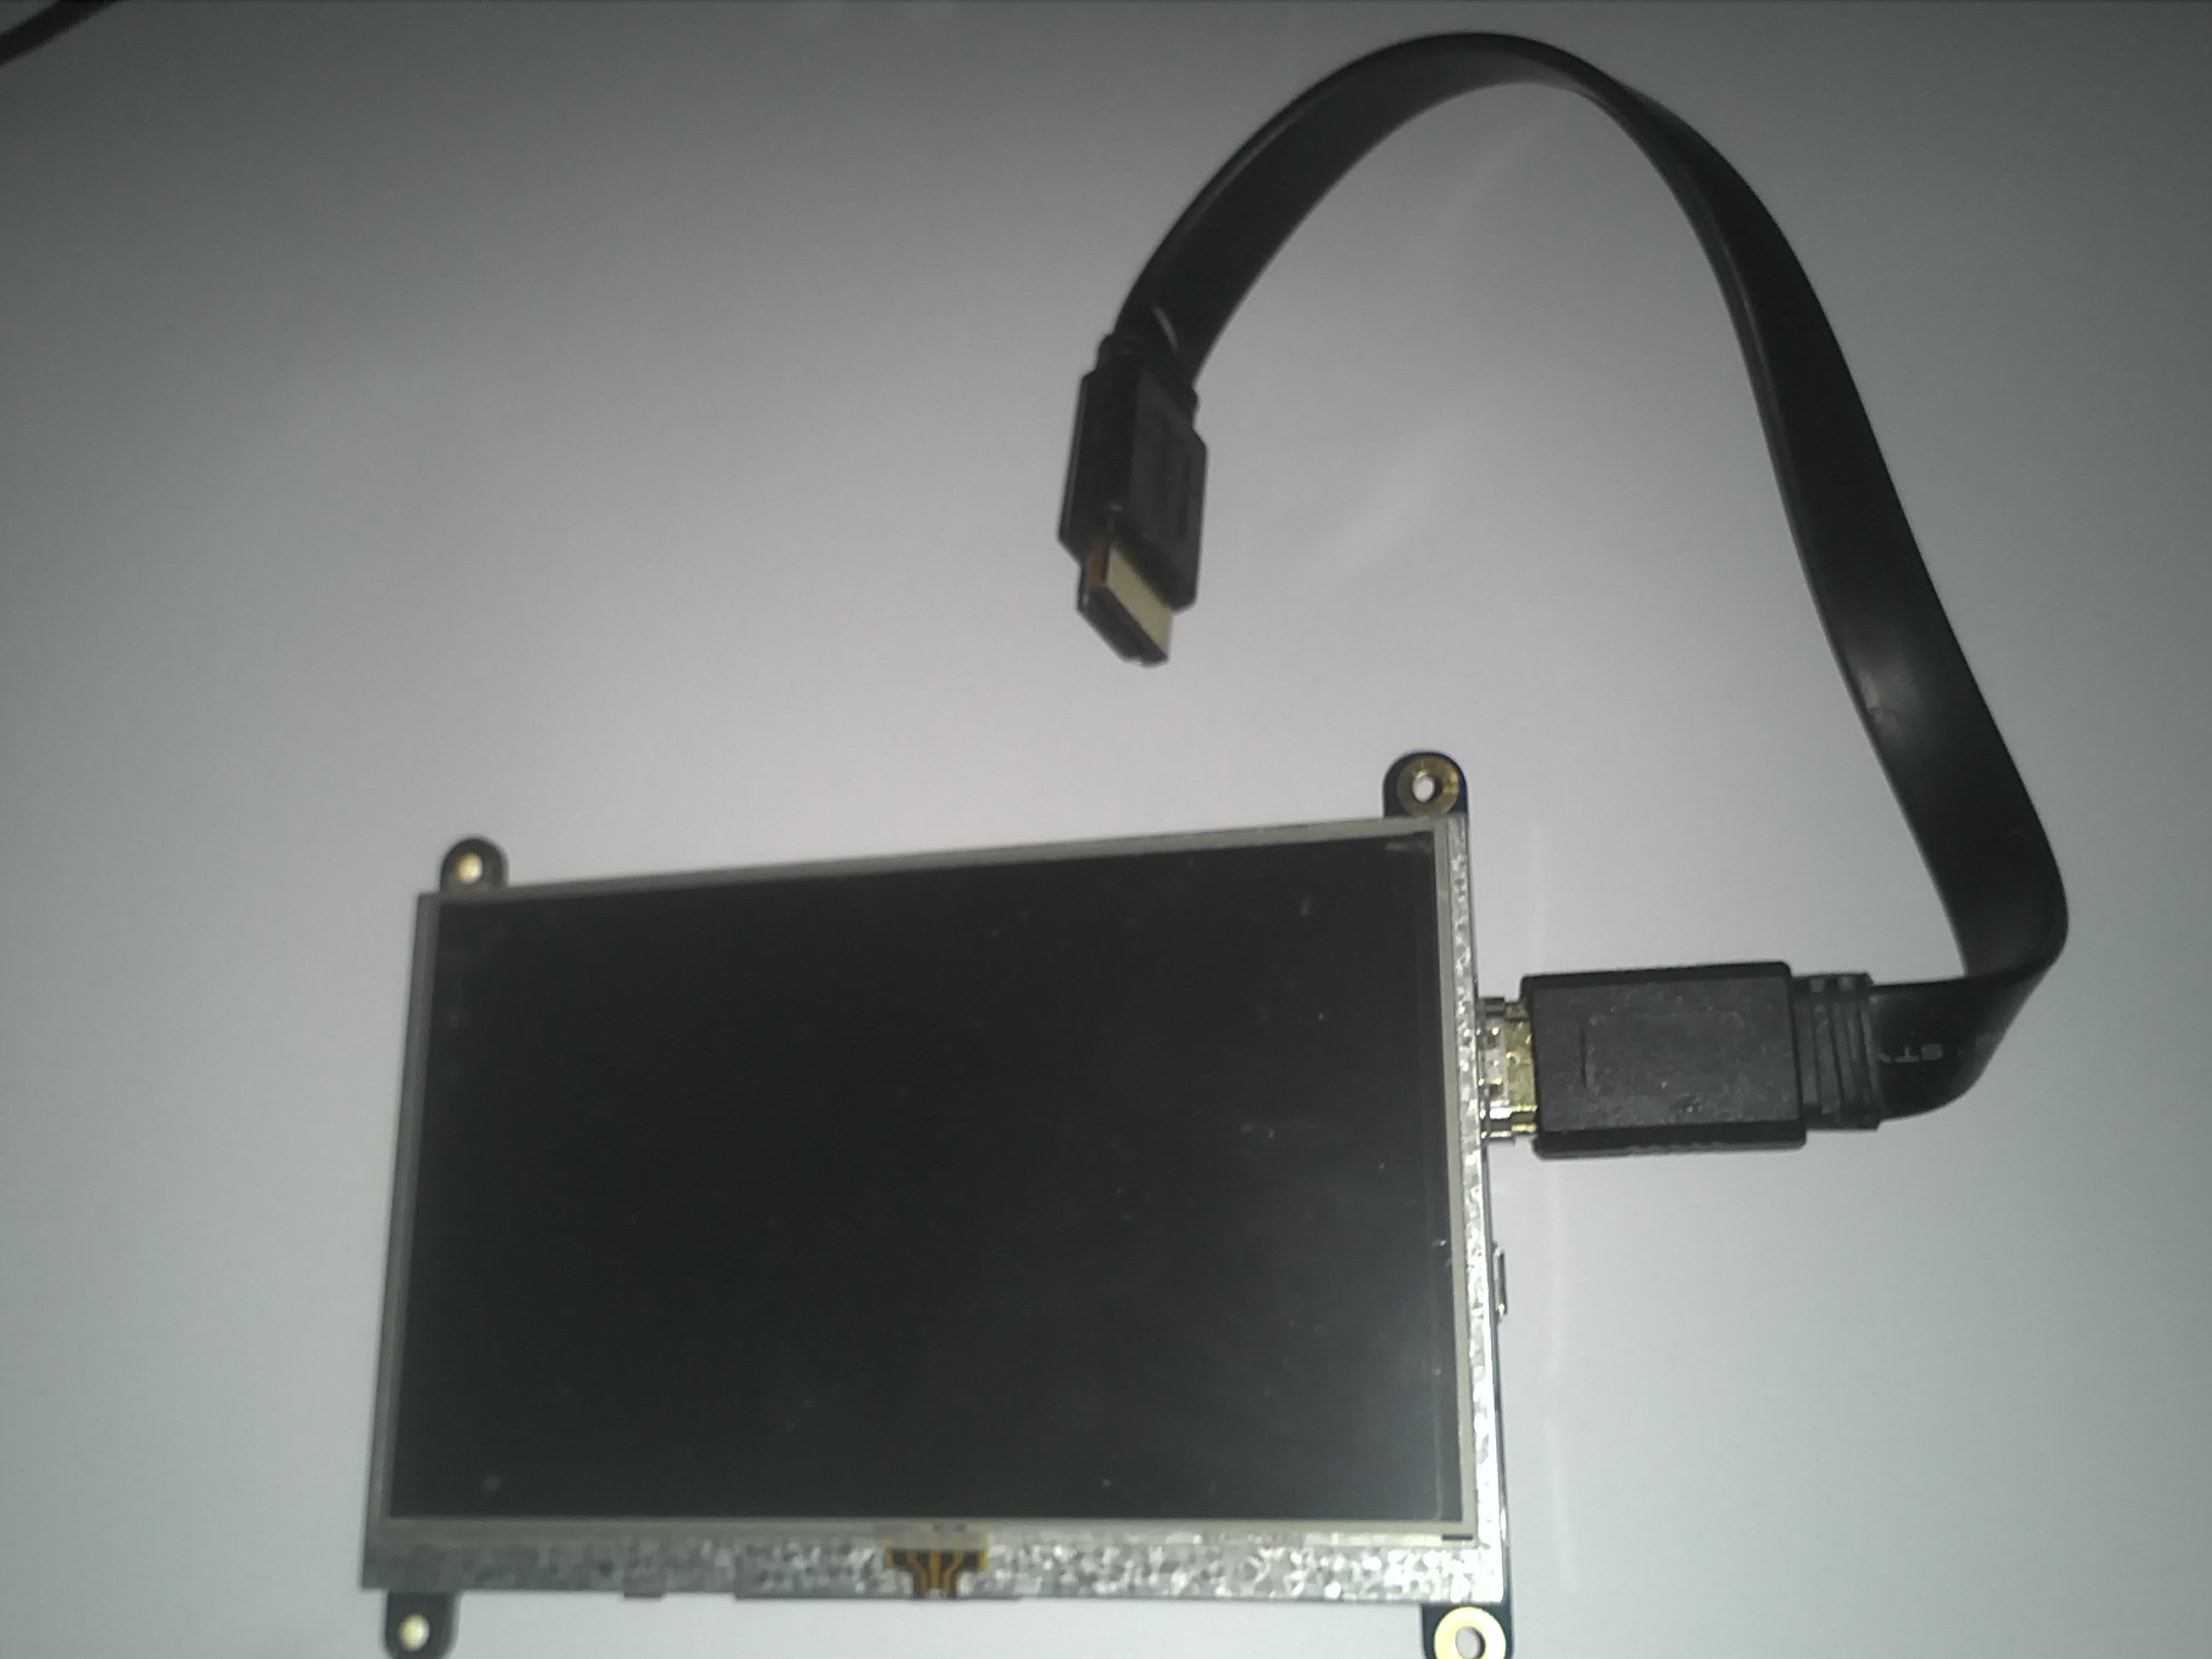
| Ecran tactile 5'' http://www.adafruit.com/products/2260 |
| Cable USB pour raccorder l'écran au Raspberry Pi |
| Batterie http://kubii.fr/modules-adafruit/379-pack-batterie-rpi-10000-mah-3272496001121.html |
| Cable USB alimentation |
| Hub USB |
| Clavier sans fil avec dongle et cable recharge |
| Souris |
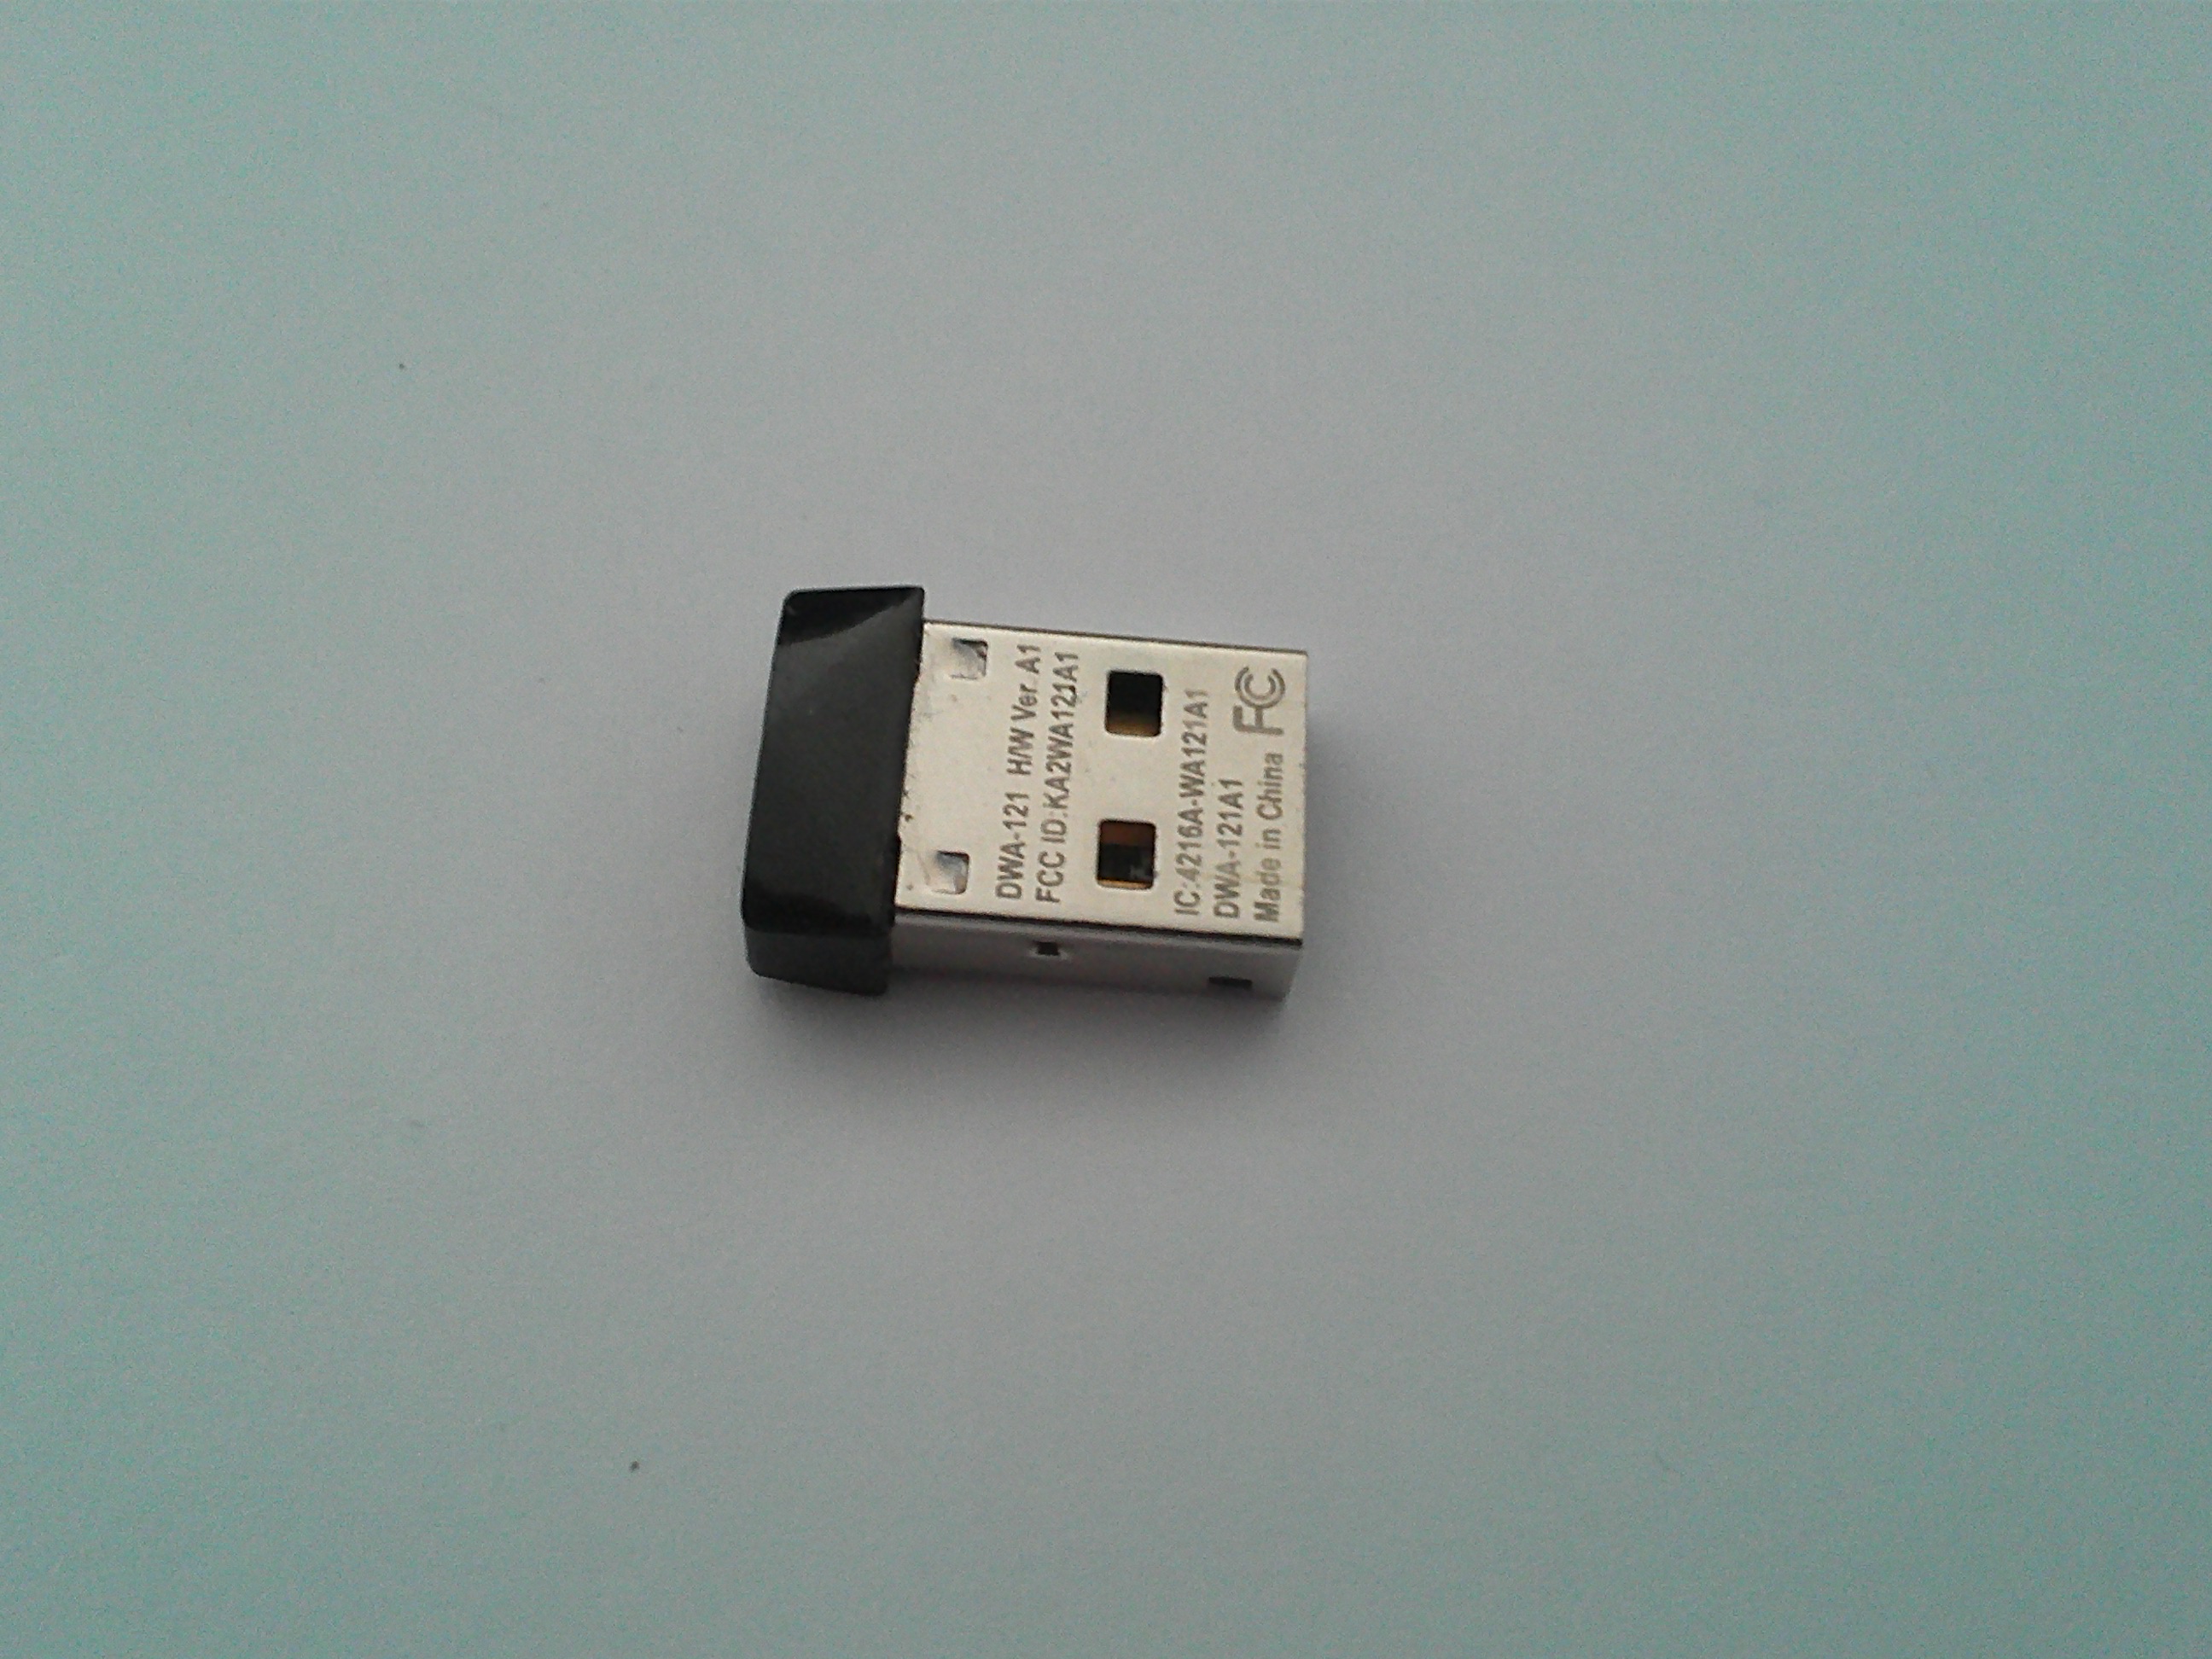
| Dongle Wifi RTL8188CUS |
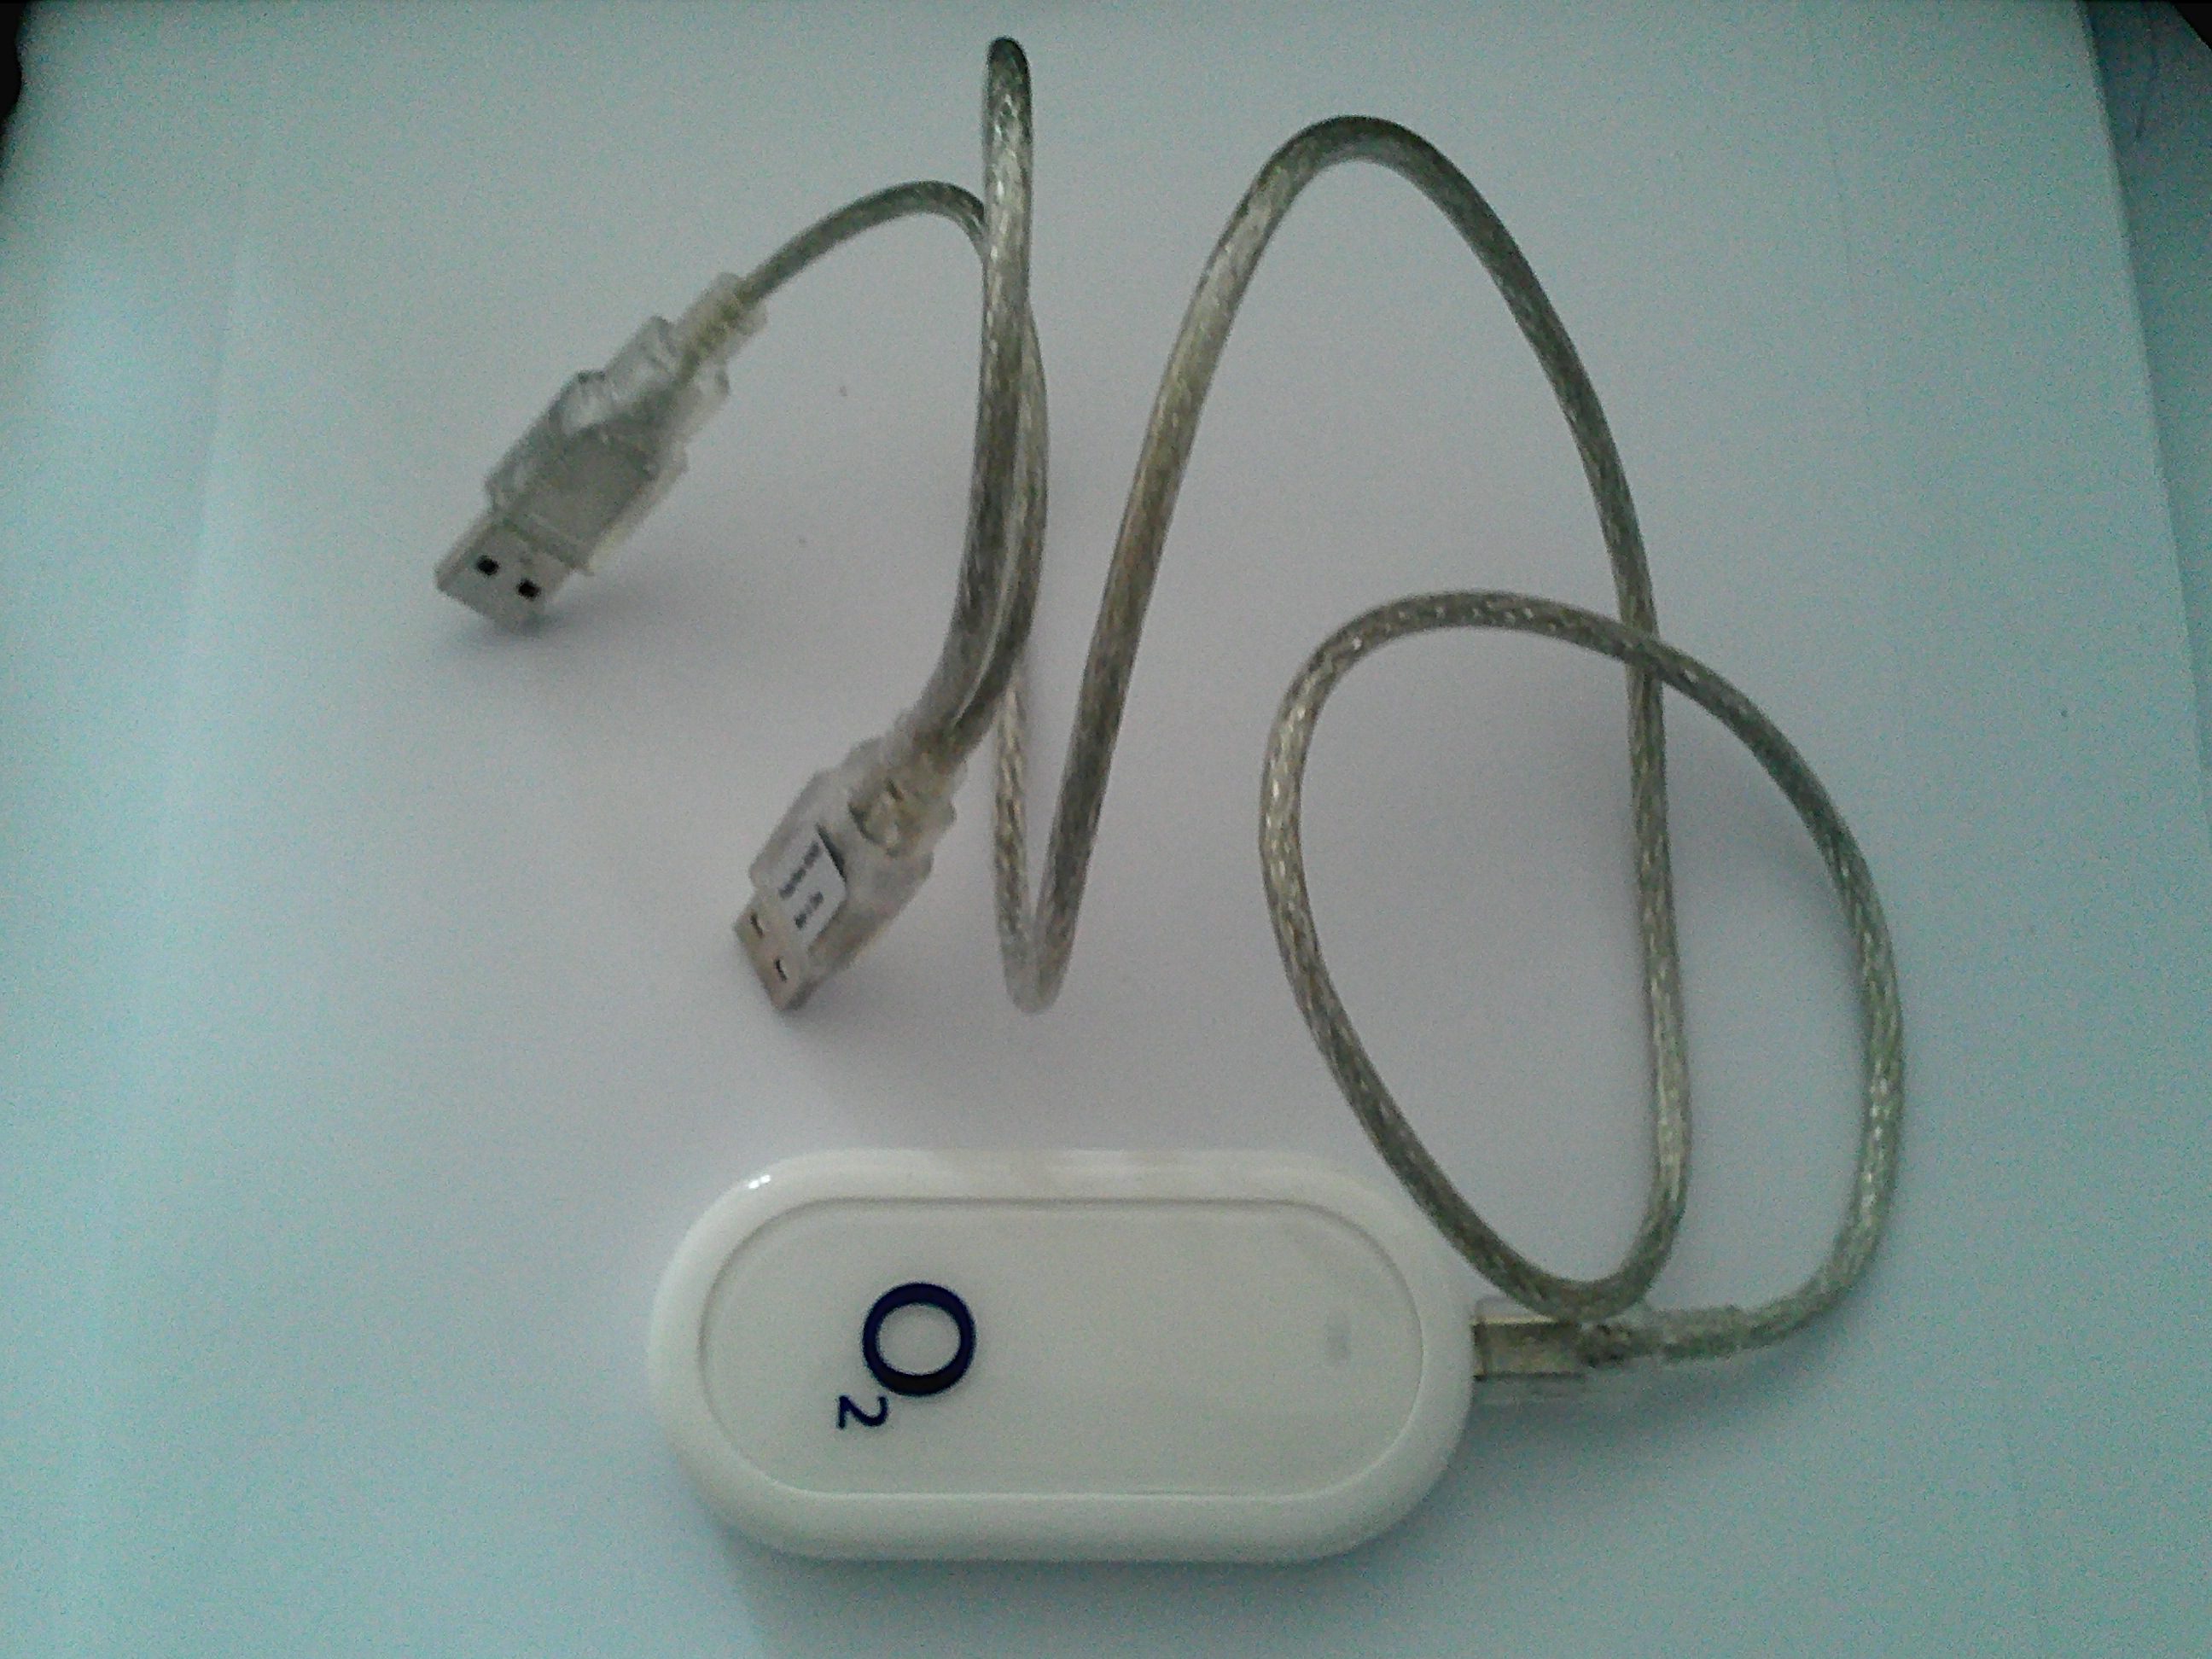
| Modem 3G Huawei E220 |
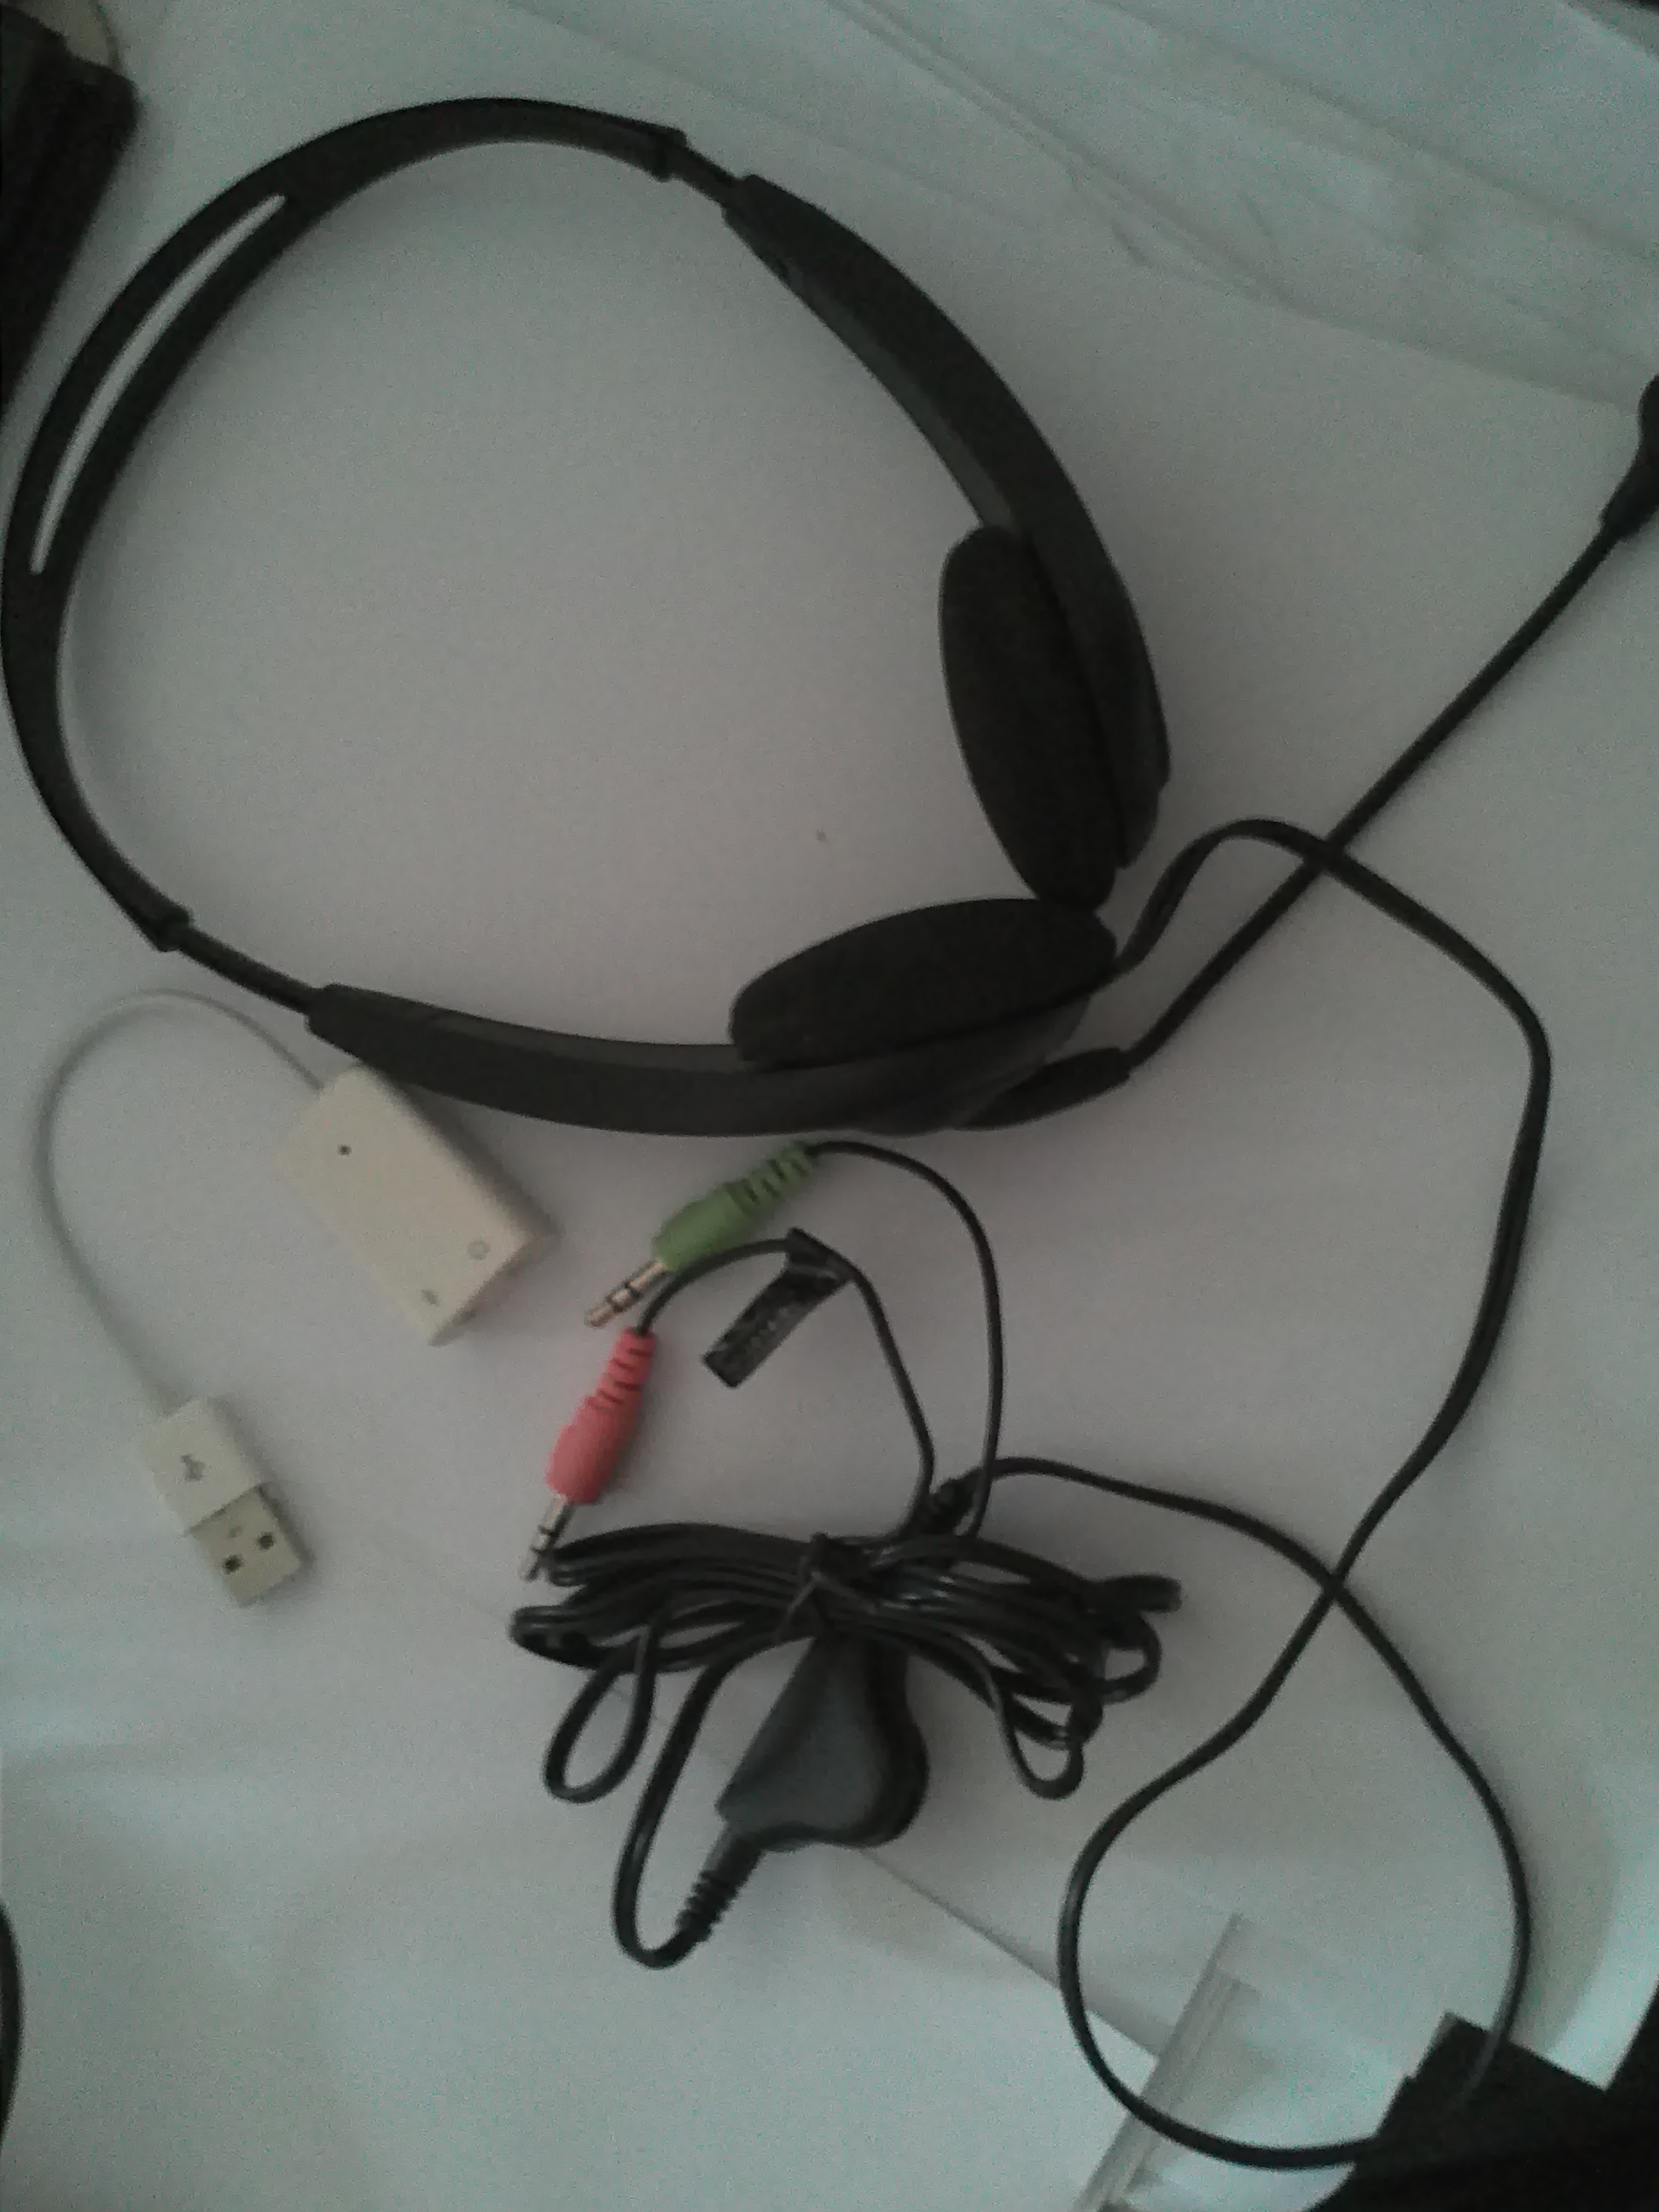
| Adaptateur audio USB et casque |
| Boite en carton et ruban adhésif |